This is a post I have been wanting to do since long time ago. I wanted to show the gardening tools I use to take care of my little garden in japan.
First of all, a little disclaimer. If you want to have a small garden, you don’t really need to have any tools. They do help make the work easy sometimes, but you can always get away without them. For bigger gardens they might be necessary, but for a little balcony like mine, no tools are really needed. You can always use your hands or whatever is available to get the job done.
So, don’t be afraid of starting your own little garden, no tools or anything special equipment required!
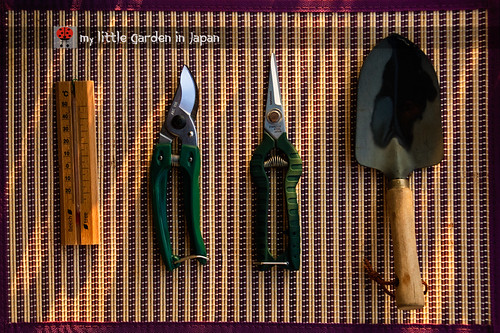
Having said that, here is the very small collection of tools I have gathered over my time in Japan.
My shovel. A very basic component of the gardening gear. Good for moving soil around fast with out getting the hands dirty. I got this one very cheap at the dollar store. It is sturdy and has a wide spade, just what I need. I usually only use it when I need to move a lot of soil from one pot to another or when I need to mix soil. Otherwise I prefer using my hands. I like the very cool organic feeling of having a bunch of dirt on my hands. Also, using my hands gives me better control to handle the plants with the proper delicacy and finesse they sometimes need.

My pruner. This is the first big budget tool I got. I bought it because I wanted to shape around my grapevine with more control. I decided not to go with the cheap one for this because I consider it to be like a doctor scalpel, only for plants. I would not like my doctor to make an operation on me with a dull or bad scalpel, so I won't do it to the plants either. By the way, also remember: It is best to always clean your blades after using them. You wouldn’t want a surgeon to cut you with a rusty blade, so why do it to the plants? Also they will last much longer that way. They are way too expensive to be buying more every time just because we didn’t wipe it afterwards.
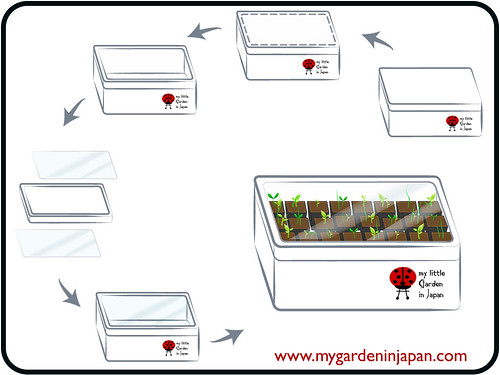
My thermometer. I only got this one because I wanted to see if the coldframe was really working or not, but it has become more handy ever since. It Is always good to see how the weather is doing. Being to know when is the time to sow some seeds or when to take some plants in. The on-line weather report might get it close, but will never tell you exactly how cold is out there in your little balcony.
My gardening scissors. The most recent acquisition. I used to do most of the beheading of dead flower buds, the harvesting of vegetables and some other fine jobs with the big pruners, but they always felt a bit too big for that task. It was hard to maneuver them between delicate leafs or in the inside of the branches. The pruners were just too bulky. So, when I saw this good set of gardening scissors for sale at the garden center, they had to come with me that day. They do get very handy. And now, since harvesting and beheading is what I do most, they have become my most used tool. Of course I still behead and harvest with my hands sometimes, because is just more fun that way.
What tools do you use on your garden?
Also, It was a busy start of the week for me. I have so many exams, and after that a lot of projects to finish. But I will still try posting as often as I can.
My balcony gardening tools
First of all, a little disclaimer. If you want to have a small garden, you don’t really need to have any tools. They do help make the work easy sometimes, but you can always get away without them. For bigger gardens they might be necessary, but for a little balcony like mine, no tools are really needed. You can always use your hands or whatever is available to get the job done.
So, don’t be afraid of starting your own little garden, no tools or anything special equipment required!
Having said that, here is the very small collection of tools I have gathered over my time in Japan.
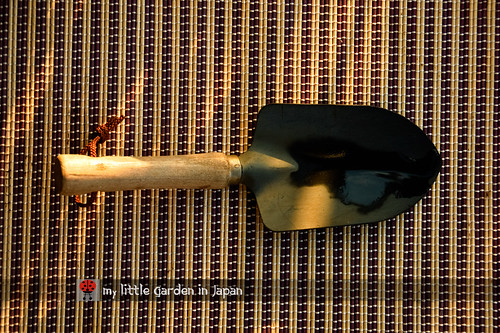
My little shovel
My shovel. A very basic component of the gardening gear. Good for moving soil around fast with out getting the hands dirty. I got this one very cheap at the dollar store. It is sturdy and has a wide spade, just what I need. I usually only use it when I need to move a lot of soil from one pot to another or when I need to mix soil. Otherwise I prefer using my hands. I like the very cool organic feeling of having a bunch of dirt on my hands. Also, using my hands gives me better control to handle the plants with the proper delicacy and finesse they sometimes need.
A set of gardening pruners can be handy
My pruner. This is the first big budget tool I got. I bought it because I wanted to shape around my grapevine with more control. I decided not to go with the cheap one for this because I consider it to be like a doctor scalpel, only for plants. I would not like my doctor to make an operation on me with a dull or bad scalpel, so I won't do it to the plants either. By the way, also remember: It is best to always clean your blades after using them. You wouldn’t want a surgeon to cut you with a rusty blade, so why do it to the plants? Also they will last much longer that way. They are way too expensive to be buying more every time just because we didn’t wipe it afterwards.
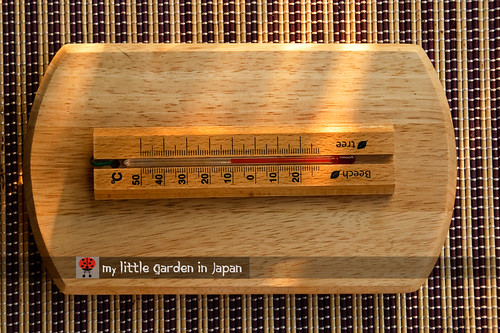
Is always good to know how is the weather
My thermometer. I only got this one because I wanted to see if the coldframe was really working or not, but it has become more handy ever since. It Is always good to see how the weather is doing. Being to know when is the time to sow some seeds or when to take some plants in. The on-line weather report might get it close, but will never tell you exactly how cold is out there in your little balcony.
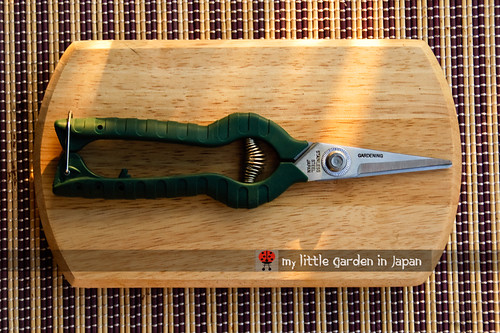
Gardening scissors are good for the small jobs
My gardening scissors. The most recent acquisition. I used to do most of the beheading of dead flower buds, the harvesting of vegetables and some other fine jobs with the big pruners, but they always felt a bit too big for that task. It was hard to maneuver them between delicate leafs or in the inside of the branches. The pruners were just too bulky. So, when I saw this good set of gardening scissors for sale at the garden center, they had to come with me that day. They do get very handy. And now, since harvesting and beheading is what I do most, they have become my most used tool. Of course I still behead and harvest with my hands sometimes, because is just more fun that way.
What tools do you use on your garden?
Also, It was a busy start of the week for me. I have so many exams, and after that a lot of projects to finish. But I will still try posting as often as I can.