Showing posts with label pots and containers. Show all posts

Thursday, 29 September 2011

A perfect container for growing strawberries in the balcony

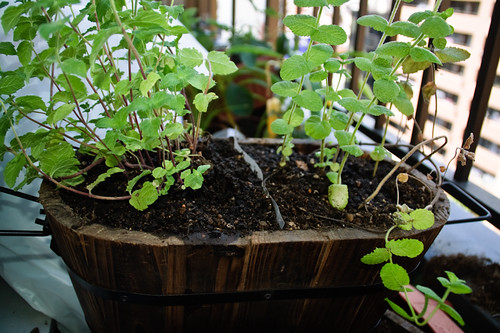
As you know, I have lost my strawberry twice patch so far, once to some unknown disease and other time to beetles. So, to avoid having to buy everything from scratch again, I decided I must have some sort of back up strawberry patch. The only problem is that my little garden hardly can fit more plants and having duplicates for six varieties of berries takes a lot of space. Fortunately I found a perfect container to fit all of my berries in a very compact way.

strawberry-stackable-pot-1

A great container for growing strawberries


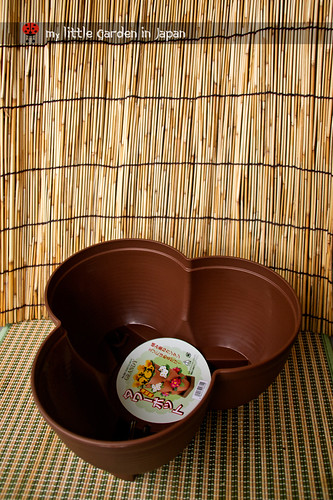
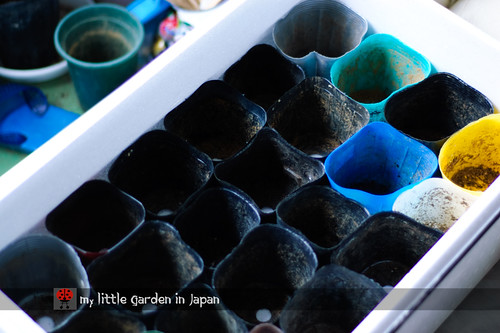
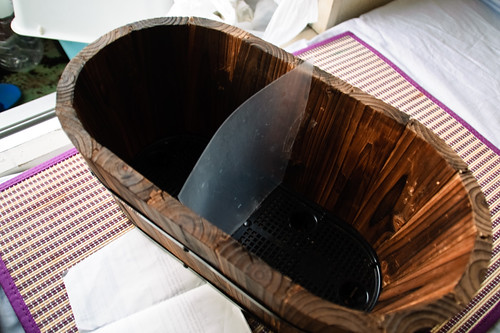
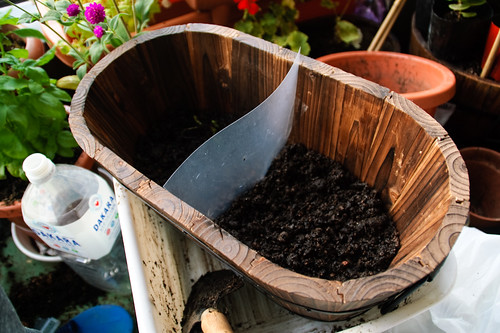
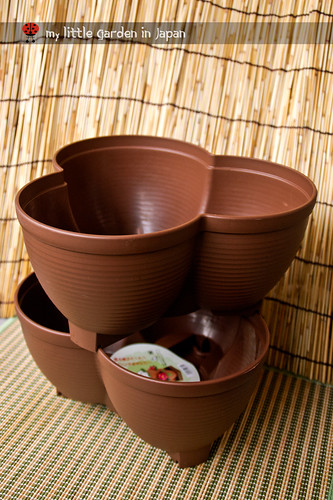
While I was browsing around the 100yen store (dollar store) I found this amazing planter. It is a stackable three way pot. It is great, just the perfect size and depth. I can set my strawberries the same way as in a traditional strawberry jar pot, but because this one can be taken apart it is much easier to maintain. Also, I can shuffle around the levels to assure each plant gets lots of sun when they need it.

strawberry-stackable-pot-2

I can stack them and keep all my strawberries in a little corner


It is always good having a back up for valuable plants and this is just the planter I needed. Some of the strawberry varieties are hard to get or a bit expensive. I will save a lot of troubles and costs in case something bad happens (it already did, but more about that later).

strawberry-stackable-pot-3

Now I only need to make some tags


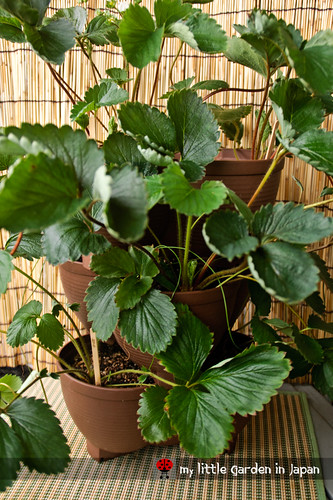
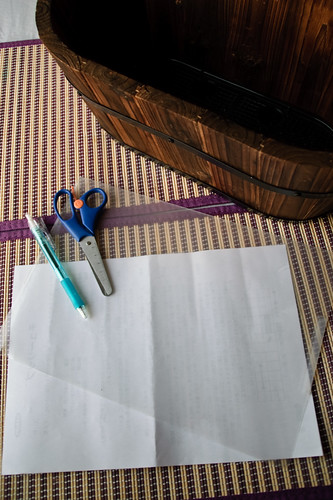
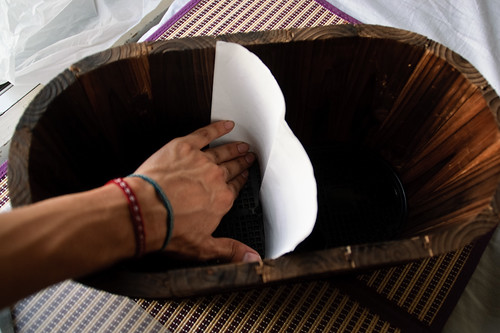
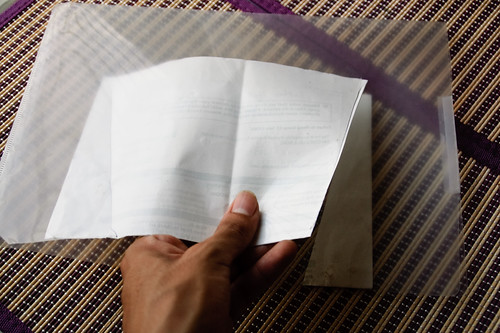
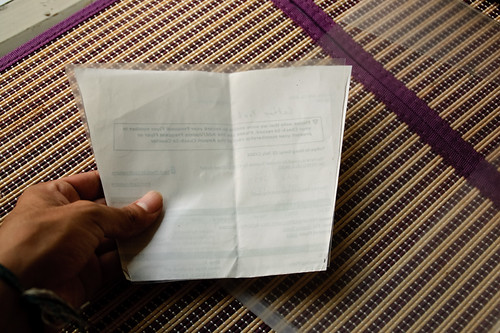
The next step is to keep organized, I need to make some good labels and tag which strawberry is which one.

Wednesday, 26 January 2011

How to set a plant in a container

Some time ago I had a couple friends ask me about how to start their own little garden. They had never really tried gardening beyond having a little indoor plant they bought out of a whim, so growing their own vegetables and mayor crops felt a bit too overwhelming. They wanted to know all the basics and I was very happy to answer all of their questions and get them started.

One of their first questions was how to set a plant to grow in a pot. I think this is a very good question, one that many people who is starting also have. So I decided to make a post about it. Here it is, a small introduction to container gardening for anybody wanting to start their own garden. I made it back when I plant my globe amaranth

How to plant in a container


To start, let's check the fundamentals. The basic layers for a plant in container are as follows.

How-to-plant-in--a-container

The layers in a pot


  • At the bottom a drainage layer, this will help the water flow properly and avoid water clogs and damage to the roots because of this.

  • Then there is a base layer of soil. Here is where most of the new roots will grow.

  • On top of that, it goes the root ball of the plant, all surrounded by more of the new soil. The root ball is the main mesh of roots from the plant, usually all what was on the starter pot.

  • And finally, the top layer made of mulch. The mulch is just a protective cover over the soil. It is good to retain moisture, reduce erosion, provide nutrients and suppress weeds.


With this knowledge, we are ready to set our plants in their pots.

What you will need


How-to-plant-in-a-container-10

A good pot and gravel for drainage


  • Gravel or other material for drainage You can use broken pottery, washed seashells, packing peanuts and many others.

  • A proper sized pot Not to big, not to small. Even if the plant will grow a lot, is best to repot several times in gradually bigger pots, than to put in a huge pot from the start.

  • Good soil Depending on your plant different soils will be more recommended. However, black, rich in organic matter soil usually works well with most plants.

  • Much Peanut shells, dried leafs, shredded or chipped bark, straw, etc.

How-to-plant-in-a-container-9

Black, good soil is best


Setting your plant in the container


  1. First, If your plant just came home from a greenhouse or a garden center far away with a different climate, let it rest for a couple of days. This will help it adjust to its new environment.


  2. Water one day before or in that morning to assure the plants have plenty of water and also because working with moist soil is much easier. Remember, the soil must be moist, not damp.

How-to-plant-in-a-container-8

This hole was too big, so I got some wood sticks in to help


  1. Rinse or scrub the container to get rid unwanted materials, then check to make sure it will have proper drainage. If the hole is to small, make a new one, if it is too big, put something to partially obstruct it.

How-to-plant-in-a-container-7

Good draniage is essential


  1. Add a layer of drainage material. Between two to six centimeters should be enough, but adjust it depending on the size of your pot, and remember to make it even.

How-to-plant-in-a-container-6

Add enough soil to have a good base


  1. Add the soil, compost, or potting mix, to have the soil base. Put enough soil to assure the plant will be at the proper height. Some plants, like strawberries, have a depth they like to be. For those make sure the amount of base soil will not make the newly potted plant be deeper than it was in the original pot. Others, like tomato, prefer to be buried deeper than they were, so they can grow new roots from the stem.


  2. If you are going to add some fertilizer you can add it in this layer. But make sure it is slow release fertilizer, to prevent it from burning the growing roots of the plant.

How-to-plant-in-a-container-5

Hold the plant firmly, then carefully turn upside down


  1. Now the tricky part, get the plant out of its old pot and into the new one. To remove the plant from its old pot, slip your hand over the top of the pot, holding the plant's stem between your fingers and the soil with your hand, then turn the pot upside down. Give the old pot a little pat and gently sake it and pull it up until the root ball is out .

How-to-plant-in-a-container-4

Untangle the roots


  1. At this point, you will be holding the root ball. If the roots encircle the plant, very gently try to loosen up some to untangle them a little. This will help the roots to spread out in their new pot and prevent many problems later on. If the roots are too tangled together you can snip a couple or slice about a centimeter of the outer layer of the ball.

How-to-plant-in-a-container-3

Place the plant in the pot


  1. Carefully place the plant on its new home, make sure is centered and leveled, then spread out the roots a bit more.

How-to-plant-in-a-container-2

Add soil around the roots and press to get rid of excess air


  1. Then add the rest of the soil evening it out and pressing the soil against the plant, just enough to eliminate any large air pockets without compressing the soil.

How-to-plant-in-a-container-1

Good soil will make its own mulch


  1. Add a final layer of much if you want to, the plant with sure appreciate it, although is not completely necessarily.


  2. Finally, water thoroughly, until water runs out the drain holes, to moisten the roots and to settle the soil.


And there you have it, the plant is set.

How-to-plant-in-a-container

Take good care and it will live happily


Keep it in place with plenty of light but away from direct sunlight for a couple of days If you can. Also take extra care of it for some time to make sure your plant adjusts to its new house. And remember, plants should be moved into larger containers as they grow. So you might need to repot them later, maybe every couple of years or less depending on the plant.


Monday, 17 January 2011

World garden blog carnival. Gardening for the new year

Time for the carnival. I hope we get a lot of nice posts to showcase.

I have a lot of projects coming for this year. And one of the most important is my grape.

My-blueberries-and-some-autumn-color-in-my-garden-2

My grape fading into winter


I have always wanted to grow a grapevine in my garden. But, I always thought it would not happen until I got a house for myself. When I started my little garden here I considered buying one for one moment, but then I thought there would be many problems when caring for one in a small balcony and I kept coming up with excuses not to do it.

Even when growing on a small container grapevines can spread quite far. And since I don't have a permanent house yet, I didn’t wanted to risk having the grapevine climbing all around a balcony and then having to move and loosing all the effort from that year.

my-grapevine-4

I hope I can train my grapevine like this


But, one day when I was at a library looking at gardening books (And I mean looking because I cant read that much japanese, so I usually only look at the pictures) I saw a very nice photo of a grapevine growing on a small pot, all coiled around itself and with a lot of fruit hanging. The pot could not had been more than 15 cm tall, and the hole plant looked under a meter, but yet it had a lot of fruits. It had never occurred to me that was possible! Back in my country I have always seen it growing big, even when in a small pot. I don’t know why I didn’t thought of it before.

my-grapevine

I already set it up for starting


I looked around more in the Japanese books and the same layout was in almost all of them. They all explain more of less how to do it. I guess in Mexico we don’t try because we have the space. But here in Japan, where space is a luxury some times, growing mini grapevines is common. That is the good thing about traveling, it helps expand the horizons and think outside our own box.

my-grapevine-2

Just have to keep the branches in order
and make some good pruning


So having no more valid excuses, I got my grapevine. I also got a nice planter and some bamboo sticks to make the frame. The plan is very simple, let only one or two branches grow, keep it coiling around itself and prune a lot to keep it tight. Hopefully next year I will have it set and I will get some nice fruit our of it. The original photo I saw in the japanese book only had one level of "circling", but my planter is quite big so I think I can get away with a "two stories grapevine".

my-grapevine-3

By the end of the year it should be ready


Oh and also, some time later I saw them in person. They had a couple in the garden center. I have even seen a bonsai grapevine with some fruit too. That should teach a lesson about thinking out of the box.

Now is your turn, What are your gardening plans for this new year?


For the blog carnival, please input the link directly to the post you are submiting in the widget below. Just click the blue button that says add your link.

Remember it must be a post about what do you plan on doing at your garden this year, maybe about one particular plant you want to have, a renovation you will do, a special patch you will grow, a new gardening technique you will give a try, or any other project you have prepared for this new year.

If you have more questions about the carnival or you want to add a link to this page click here to go to our carnival main page. There you will find more information and some resources you can use.

Or if you want to see past carnivals click here.

Also, add a comment if you like and let us see what your garden is bringing this new year!


Tuesday, 11 January 2011

The banana peels fertilizer works very well

If you haven't come here lately, you can probably notice I did quite some changes. Like I said back in the new year post, I have a lot of projects and ideas I want to try and share. I feel very motivated about continuing with the blog, it keeps growing more and more every day. You have given me a very nice response, so I will put more effort into continuing it. Thank you very much!

Internet tree

This is my new Internet tree


The first change I did was the layout. I think three columns will give me a better space for very needed internal links. I have a lot of projects on the way, and there is where they will live. I hope you don’t mind it takes a bit of space from the post, I tried to keep them the least intrusive. I also tried to keep the space to have big enough photos, because the photos always get many praises.

Other change, is the blog carnival icon on the upper left corner. That will be the entrance to the carnival introductory page, feel free to pay it a visit. All the carnivals, that were and will be, will be accessible from there.

One more change is the header. I am experimenting with a lot of tools and styles, and I plan on changing the header and the background accordingly to the season let me know which one is your favorite.

I also did a lot of little changes. Things like margin size or where some icons go. The menu bar, the search bar and others. I hope it looks better and more professional now.

The last new feature is the social media buttons Internet tree on the upper right corner. I feel specially proud of this one. I did the drawing almost from the scratch and I had to do a lot of learning to have the links and everything on the right place and working properly. Also, I end up doing a lot of little drawings that I won’t use, but I think others might find useful, so be on the lookout for a goodies page. I will put them all there.


Ok, now on to the gardening matters. Last post I got a couple questions about banana peels fertilizer. I had done a post about it back in November, but I didn't showed the results. Well, here they are. Back then, because I didn't had many peels, I had only put fertilizer on one of my flower pots, the one that needed it the most. So only one got the benefits and now I am seeing the differences.

I think is a fair comparison. Both planters have almost the same kind of flowers, they get the same amount of sun and of water and the soil where they are planted comes from the same bag. Also, I normally trim the dead buttons to keep them flowering, though lately I have not done it as much because I am waiting for seeds.

On with the comparison then. First planter A, I did not put any fertilizer on this planter. It bloomed beautifully back when it was new, but with the cold it slowly started to recede. Here is the photo of flower planter A.

The-banana-peel-fertilizer-works-well-3

These flowers need some banana fertilizer urgently


As you can see the pansies and the alyssum hardly have any flowers. The lemon marigold, even though is very hardy, is starting to get bald. And the stock is down to its lasts flowers. The only one that still seems strong is the Blue ballon scabiosa.

Now planter B, the one that got its dose of banana fertilizer. This one was starting to have less flowers back then, that’s why I decided on using the banana peels on it. Here is the photo of flower planter B.

The-banana-peel-fertilizer-works-well-2

This ones are blooming nicely because
they already got banana peels fertilizer


What a difference! The pansies are in full bloom, and with a lot of new buttons coming up. The stock has lasted much longer, and still have buttons. The cosmos, even tho is not as resistant as the mint marigold, still has a lot of its flowers. Also, the alyssum is much more grown and flowered.

That is the difference that a little of homemade banana fertilizer can make. Which teaches me that I should have putted some fertilizer in both planters back then. But in the end it is no problem, because, I recently got a new bunch of bananas and I am planning on making a lot of milkshakes out of them. I have to get them very green so they last long enough for me to finish them.

The-banana-peel-fertilizer-works-well

I can get a lot of banana fertilizer out of this one


Click here for my old post about making banana peel fertilizer for containers.


And remember, seven more days to the carnival!

Be ready with a post about what do you plan on doing at your garden this year, maybe about one particular plant you want to have, a renovation you will do, a special patch you will grow, a new gardening technique you will give a try, or any other project you have prepared for this new year.

Wednesday, 15 December 2010

Coldframe V2.0

I had been wanting to upgrade my coldbag, because even it works really nice, the little seedlings could have even more advantages. In particular I wanted something that would let more sun to the little seedlings. 

coldframe-v2-3

The new seedlings are doing great


So I started scavenging for materials to use. I didn't wanted to build one out of wood and glass, because my goal was keeping the portability and cheapness of the cold bag. I considered using a cardboard box, but I knew that on the first rain, or with the water pouring out from the little started planter, I would end up with a cold frame soup in no time.

Then I remembered that here, at some grocery stores, they always leave all the plastic boxes from the food, all cleaned and ready for people who need them to pick them up. So, one day I went grocery shopping, I took a small look at their little recycle corner. There I found the perfect box. It was a deep, thick expanded polystyrene box, in perfect condition.

coldframe-v2.0

Building the new coldframe


The build was very simple.
  1. I carved a small window on the cover of the box to leave only a frame. Being sure to leave a small edge

  2. Cut apart a transparent plastic bag to have two sheets to use as "glass".

  3. I taped one of the transparent sheets to the edge I had left and cover the hole in the frame.

  4. Turn around the lid and tape the other sheet from the inside. This will make the window a sandwich of plastic, air and plastic.

  5. Finally use little pieces of tape to cover any hole in the borders. The more airtight the better

I used two plastic sheets, one in each side of the cover. That way the insulation will be much better. The air in the middle will work as the insulator. The same way a double glass (double frame) windows work better than a single glass window. 

So far it has worked beautifully. The little seedlings growing there sprouted in no time, they have even reached the size of the ones in the coldbag already.

coldframe-v2-2

From back to front: Bekkana, Spinach, Komatsuna, Lettuce


The first to grow were the Bekana and the Komatsuna, then the spinach and finally the lettuce, coriander and the chives. I was surprised the chives and the lettuce sprouted, they are supposed the be past their season. They must really be very cozy and warm in there. I hope they all keep growing nicely, I will post more about how they develop later.

Now, the only setback is that the new coldframe has such a good insulation that every morning the inside screen appears all damped because of the condensation. I have to dry it a bit and clean it up so it will let the sunshine in.

I recommend anybody who wants to have a nice cheap planter at their homes to use old expanded polystyrene boxes. First, because is much better to reuse them than throw them to the garbage. Second because they are great planters. Expanded polystyrene is a great ecofriendly material, even though it certainly doesn’t look like it. It is a great insulator, and has an amazing endurance for such a light weight. It definitely won't mold and It will not degrade easily, so I can last lots of gardening seasons.

coldframe-v2

The first seedlings sprouted in 4 days


One more thing about polystyrene. It is highly recyclable, but it very hard to do it because it has to be sorted away from other materials, which is a very troublesome task. This causes a big problem because it is usually thrown with normal garbage and pollute instead of being recycled. So, if you can rescue some polystyrene from going to the dumpster, and give it some more years of use please do.

Wednesday, 24 November 2010

More winter vegetables to sow

Last time I went to the garden center, during the big sale where I got the flowers for last blooming day, I couldn't help but to peek around the seeds section; They had so many that I would like to try and that are still on season.
So, since I had such an amazing success with my homemade coldbag, I decided to give some more vegetables a try.

more-winter-vegetables-to-sow-2

New winter veggies


I picked two new green vegetables to sow:
  • Spinach Great vegetable for winter here. Rich in vitamins and minerals. I think It will be a great addition to my veggies. They must be sowed on autumn and continue to grow until early spring. It is funny, I didn't know spinach seeds were so colorful.

more-winter-vegetables-to-sow-3

Colorful Spinach and Bekana seeds


  • Bekana The Japanese version of the Small Chinese Cabbage. It is Yellowish-green with frilled leaves and white flat petioles. Great for stir-fry or soup. It grows all year round, really fast and very easily. Also, because its small size, it will be simple to grow it in my little balcony. The seeds are very similar to the Komatsuna

I will sow them inside a new coldframe I am working on. I hope they will be as successful as the last seedlings batch.

more-winter-vegetables-to-sow-1

Stay tunned for the coldframe V2.0


Also, the blog carnival is decided! It will be the 30th of this month.

Be ready to post your favorite flower, vegetable, bush, tree, cactus, shrub, herb, moss, algae, fern, fruit, root, creeper, climber, grass, weed, bulb or any other plant you love (or more than one if you prefer).

Show us the best of your garden, meet fellow gardening bloggers and get some inspiration!

Saturday, 4 September 2010

How to make a division to separate plants on a container

Today I moved around everything in my garden. I got several new pots for this season crop so I'm trying to make more efficient use of my little garden space. One of the projects I wanted to do to accomplish this was changing my mints to a new pot. Their current one is very wide, which is great for the plants, because they have space to spread and give more branches, but no so good for me because I have way more leafs than I need and the pots take too much space.

So, I decided to move them, and I got a very nice wooden pot, perfect size to fit both and just the right depth. But, there is one problem, mints spread very aggressively, they compete with everything around them, including each other. This means that if I simply put both plants on the same container over time I might end up with only one, the strongest one.

To prevent this I needed to make a division that would keep each mint on their side of the pot. I used a old plastic folder and used a very simple procedure.

Here is how I did it

Materials needed


My garden 0044 September 02, 2010

A very simple project to divide your container


  • The container you want to divide

  • Recycled paper

  • Rigid plastic sheet

  • Scissors

  • Something to write with (a pen, marker, etc.)

  • Scotch tape (or similar)


Step 1: Decide how you want to make the division


My garden 0045 September 02, 2010

Plan how to divide


Depending on your plants, you will need to decide how you want to separate them. You must determine if one requires more space to grow, if you want an asymmetric layout or if you are setting multiple divisions. For this part you can use the paper sheet and work around how you want it to be at the end. In my case I wanted a single middle division to give each plant equal space.

Step 2: Mark the shape


My garden 0046 September 02, 2010

Mark the borders


Once I have decided how I want the division. I just set the paper in that position and stretch it very good to make it fit exactly, then I mark where it meets the sides of the pot, this will give you a mold of the shape you need.

My garden 0047 September 02, 2010

You get a paper mold


You can also make folds to mark the position, but is much easier to use a pen, also you can do it directly with the plastic, but if it is too rigid, you will have problems setting it into place.

Step 3: Cut the plastic


My garden 0048 September 02, 2010

Cut the plastic using the paper mold


Using the paper as a mold cut the shape you need, then fit the plastic in the pot, if there is any irregularity correct with the scissors or cut a new plastic.

My garden 0049 September 02, 2010

Test if it fits and trim any excess


Step 4: Set the plastic in place


My garden 0050 September 02, 2010

Set in the pot


Once the plastic fits nicely in the right position secure with some tape, if you want to assure none cross you can use extra tape to fill any gaps.

My garden 0051 September 02, 2010

Fix it into place


Step 5: Fill with soil and put the plants in


My garden 0052 September 02, 2010

You are done!


Once the division is put you are done! You can just set your plants into place and they will each stay on their side (although, you can check now and then in case one manages to cross)

My garden 0053 September 02, 2010

You can have a diferent type of soil on each side


This is very simple project and can be done in a couple minutes. I hope it helps you to manage your unruly plants.


My garden 0030 September 04, 2010

Here are the mints, happy in their new home

Related Posts Plugin for WordPress, Blogger...