
Some time ago I had a couple friends ask me about how to start their own little garden. They had never really tried gardening beyond having a little indoor plant they bought out of a whim, so growing their own vegetables and mayor crops felt a bit too overwhelming. They wanted to know all the basics and I was very happy to answer all of their questions and get them started.
One of their first questions was how to set a plant to grow in a pot. I think this is a very good question, one that many people who is starting also have. So I decided to make a post about it. Here it is, a small introduction to container gardening for anybody wanting to start their own garden. I made it back when I plant my globe amaranth
To start, let's check the fundamentals. The basic layers for a plant in container are as follows.
With this knowledge, we are ready to set our plants in their pots.

And there you have it, the plant is set.
Keep it in place with plenty of light but away from direct sunlight for a couple of days If you can. Also take extra care of it for some time to make sure your plant adjusts to its new house. And remember, plants should be moved into larger containers as they grow. So you might need to repot them later, maybe every couple of years or less depending on the plant.
One of their first questions was how to set a plant to grow in a pot. I think this is a very good question, one that many people who is starting also have. So I decided to make a post about it. Here it is, a small introduction to container gardening for anybody wanting to start their own garden. I made it back when I plant my globe amaranth
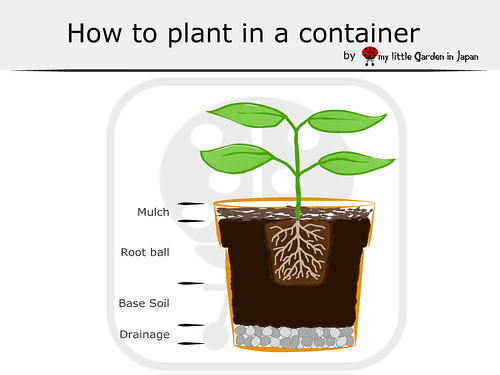
How to plant in a container
To start, let's check the fundamentals. The basic layers for a plant in container are as follows.
The layers in a pot
- At the bottom a drainage layer, this will help the water flow properly and avoid water clogs and damage to the roots because of this.
- Then there is a base layer of soil. Here is where most of the new roots will grow.
- On top of that, it goes the root ball of the plant, all surrounded by more of the new soil. The root ball is the main mesh of roots from the plant, usually all what was on the starter pot.
- And finally, the top layer made of mulch. The mulch is just a protective cover over the soil. It is good to retain moisture, reduce erosion, provide nutrients and suppress weeds.
With this knowledge, we are ready to set our plants in their pots.
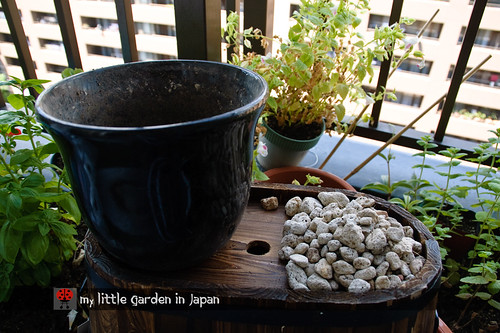
What you will need
A good pot and gravel for drainage
- Gravel or other material for drainage You can use broken pottery, washed seashells, packing peanuts and many others.
- A proper sized pot Not to big, not to small. Even if the plant will grow a lot, is best to repot several times in gradually bigger pots, than to put in a huge pot from the start.
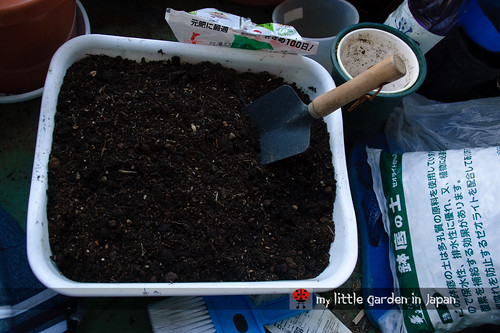
- Good soil Depending on your plant different soils will be more recommended. However, black, rich in organic matter soil usually works well with most plants.
- Much Peanut shells, dried leafs, shredded or chipped bark, straw, etc.
Black, good soil is best
Setting your plant in the container
- First, If your plant just came home from a greenhouse or a garden center far away with a different climate, let it rest for a couple of days. This will help it adjust to its new environment.
- Water one day before or in that morning to assure the plants have plenty of water and also because working with moist soil is much easier. Remember, the soil must be moist, not damp.
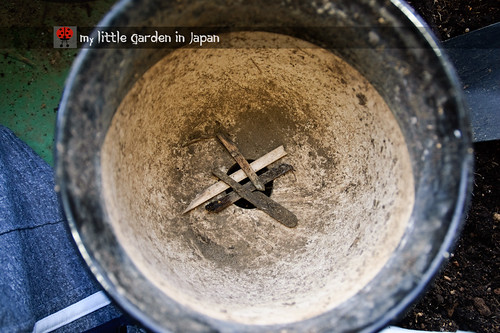
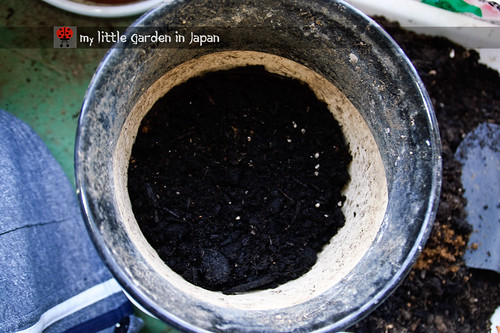
This hole was too big, so I got some wood sticks in to help
- Rinse or scrub the container to get rid unwanted materials, then check to make sure it will have proper drainage. If the hole is to small, make a new one, if it is too big, put something to partially obstruct it.
Good draniage is essential
- Add a layer of drainage material. Between two to six centimeters should be enough, but adjust it depending on the size of your pot, and remember to make it even.
Add enough soil to have a good base
- Add the soil, compost, or potting mix, to have the soil base. Put enough soil to assure the plant will be at the proper height. Some plants, like strawberries, have a depth they like to be. For those make sure the amount of base soil will not make the newly potted plant be deeper than it was in the original pot. Others, like tomato, prefer to be buried deeper than they were, so they can grow new roots from the stem.
- If you are going to add some fertilizer you can add it in this layer. But make sure it is slow release fertilizer, to prevent it from burning the growing roots of the plant.
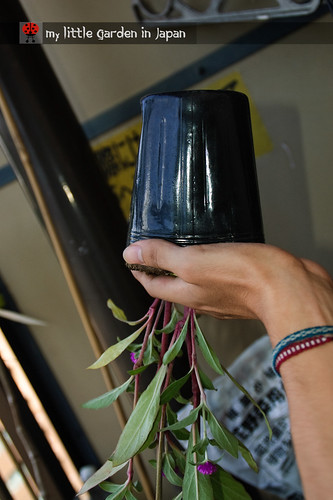
Hold the plant firmly, then carefully turn upside down
- Now the tricky part, get the plant out of its old pot and into the new one. To remove the plant from its old pot, slip your hand over the top of the pot, holding the plant's stem between your fingers and the soil with your hand, then turn the pot upside down. Give the old pot a little pat and gently sake it and pull it up until the root ball is out .
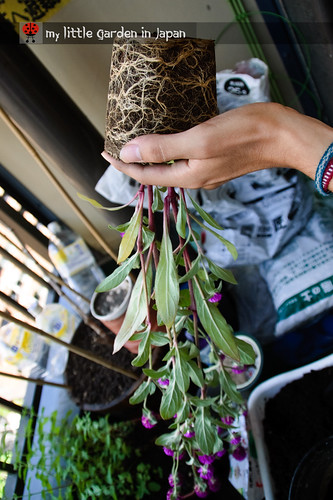
Untangle the roots
- At this point, you will be holding the root ball. If the roots encircle the plant, very gently try to loosen up some to untangle them a little. This will help the roots to spread out in their new pot and prevent many problems later on. If the roots are too tangled together you can snip a couple or slice about a centimeter of the outer layer of the ball.
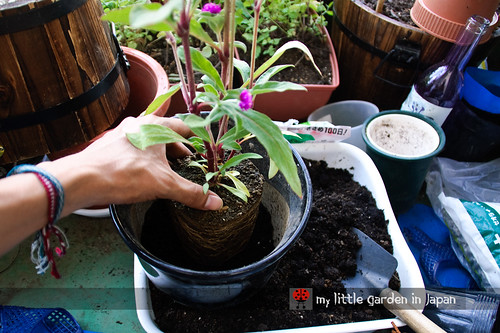
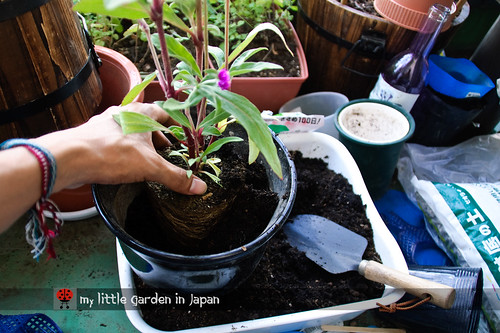
Place the plant in the pot
- Carefully place the plant on its new home, make sure is centered and leveled, then spread out the roots a bit more.
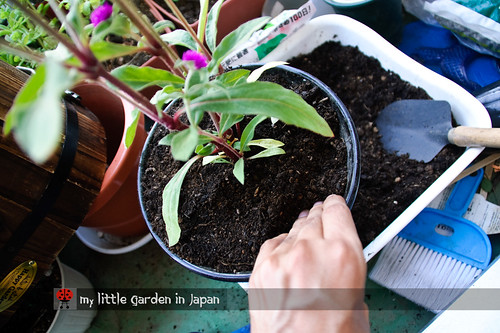
Add soil around the roots and press to get rid of excess air
- Then add the rest of the soil evening it out and pressing the soil against the plant, just enough to eliminate any large air pockets without compressing the soil.
Good soil will make its own mulch
- Add a final layer of much if you want to, the plant with sure appreciate it, although is not completely necessarily.
- Finally, water thoroughly, until water runs out the drain holes, to moisten the roots and to settle the soil.
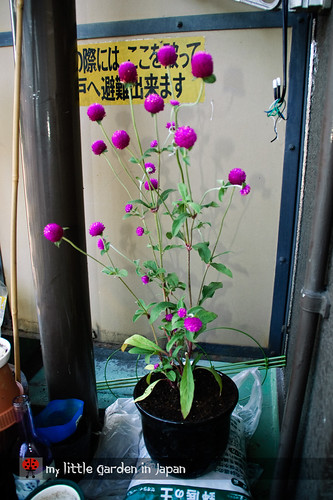
And there you have it, the plant is set.
Take good care and it will live happily
Keep it in place with plenty of light but away from direct sunlight for a couple of days If you can. Also take extra care of it for some time to make sure your plant adjusts to its new house. And remember, plants should be moved into larger containers as they grow. So you might need to repot them later, maybe every couple of years or less depending on the plant.


This informative post reminds me that I need to pay more attention to drainage when doing container gardening. I have many plants outside in containers...not in the winter, of course.
ReplyDeletedonna
Very informative -- your illustrations for this are top-notch, too. I prefer to learn visually and this is exactly the kind of tutorial I look for. I like that you even showed how to cover the drainage holes to keep them flowing freely.
ReplyDeletehave you thought of writing a book Fer?
ReplyDeleteThank you fer, very detailed written. It's a good lesson to learn :)
ReplyDeleteThis is a great tutorial fer. Your illustration is very good.
ReplyDeleteIt seems like the basic thing one should know about gardening but it is amazing how many folk do not know how to transplant. I hold a container garden seminar at the nursery and I amazed how many people take home plants that have no idea that the green side goes up.
ReplyDeleteHi Fer,
ReplyDeleteThanks for reminding again to ensure proper drainage. I just repotted my asparagus fern yesterday and it already looks happier!
Excellent instructions here!
ReplyDeleteYou gave an exhaustive description and that plant is beautiful, dear Fer! Eszter
ReplyDeleteTerrific explanation for beginners.
ReplyDeleteDear Fer, You have really presented this process comprehensively and with careful attention to detail. Perfect! I am aware that I often skip parts of the preparation and this invariably leads to poorer results. You are so right to emphasis that every tiny step matters.
ReplyDeleteMy love of plants started with growing, dividing, and repotting houseplants in my dorm room at college. My roommate showed me how. I loved taking care of them and a green thumb was born. You explained the repotting process perfectly--my roommate would approve.
ReplyDeleteGreat tutorial!! I love the purple gomphrena. :o) I grow it every summer.
ReplyDeleteYour post makes me long for spring, and the new planting season. I enjoyed your tutorial. Well done!
ReplyDeleteThank you very much! Great to see the illustrations and the photos worked.
ReplyDeleteSue ~ I would love to write a book, but I think my writing skills are still far from it haha
Tufa girl ~ I know what you mean. I was surprised they would not knot much.
Carolyn ~ It is great to know I got roommate seal of approval Thank you!
Great post and tutorial. When I'm transplanting to a bigger pot, I usually like to loosen the roots, so they immediately start to expand.
ReplyDeleteExcellent post fer! Very informative for gardeners!
ReplyDeleteYour garden might be little but is full of educative tips. Thanks for sharing! Lula
ReplyDeleteReally clear instructions fer, invaluable to a new gardener and a great reminder to those of us who think we know what we are doing to not skip steps or skimp on things like drainage and mulching.
ReplyDeleteHello Fer - you do everything with such a refined and delicate style. A delightfully informative and beautifully constructed post.
ReplyDeleteLaura
Step by step. easy to follow.
ReplyDeleteFer, you missed nothing out. Over the years I have noticed that the biggest mistake people make is not providing drainage. And on more than one occasion, I have seen plants in large pots without ever having been removed from the pot it was in when purchased. For those who don't want to make their pots any heavier,use old polystyrene for drainage,works a treat.
ReplyDeleteFer, as always, very well done with much attention to detail...your gomphrena is so cheerful!
ReplyDeleteAn excellent post indeed. Your diagram is perfect and instructions easy to follow.
ReplyDeleteThis blog is becoming more and more informative and professional (btw: I love your sketches): sincere congratulations! ;)
ReplyDeleteOT: I've just realized that you're following my blog with 2 different profiles... Did you know it?
ReplyDeleteHi Fer
ReplyDeleteVery helpful and well-illustrated. The flowers are very cheerful!
I also enjoy the chance to get a glimpse a distant place: the sign on the wall transports me, allowing me to visualize a bit of your home and to imagine living in Japan.
I must visit one day.
hello Fer, a very well-presented and informative post...i hope your friends all the best in their gardening venture...
ReplyDeletegreat how-to entry...
ReplyDeleteI do the same like you, but bravo for your post you explain very well and it's easy to follow.
ReplyDeleteThis is a great tip for planting! Thanks for visiting my blog. I just added you to my blog list.
ReplyDeleteSweet tutorial Fer!
ReplyDeleteOk...this post is a keeper. You covered everything I should remember.
ReplyDeleteThat was some great information and pictures. Thanks for your detailed instructions :-)
ReplyDelete~Ron
Great post for a beginner who wants to embark on a life of gardening!
ReplyDeleteGreat post! Well illustrated, and I like the pretty plant you potted!
ReplyDeleteGood informational post, Fer. I will have to remember to keep those broken clay pots for drainage at the bottom of a container.
ReplyDeleteA really great post, easy to understand and follow along. The end result is beautiful.
ReplyDeleteAn excellent tutorial, Fer. I appreciate the time it took to create. Thank you for the sound advice.
ReplyDeleteWhat a great tutorial!!
ReplyDeleteExcellent tutorial!
ReplyDeleteWhat a great post Fer!!! What is the name (kind) of the plant? It's so beautiful!
ReplyDeleteOh the name is amaranth!!! almost the same name in Greek AMARANTO. (my English are so greekglish!)
ReplyDeleteFer, I am sure this post will be a great help for anyone looking to transplant a flower from a small pot to a larger one.
ReplyDeleteSuch a thorough how-to for starting a container plant! It's rather alarming how many people these days never really learn how to plant anything, whether in the ground or in a container. It's great that you've created such a great resource for new gardeners!
ReplyDeleteThank you! I hope this helps people starting out. I am surprised how a lot of people don't really know how to.
ReplyDeletedona ~ I was moving my follows from one account to the other, there were some overlapping, but I think is ok now.
donkey and the carrot ~ in spanish is also amaranto, funny how they coincide.
Great tutorial. You can also use a leftover cloth in the bottom instead of the twigs.
ReplyDelete(I just learned that from a video demonstration, available here - it's in a weird language mind you.)
Hi Fer, this is powerdonuts on twitter. I just wanted to add that if you're looking at organic gardening, using polystyrene is probably not the best way to go as the chemicals in polystyrene can leech into your food. However, using polystyrene on non-edibles/ornamental plants should be fine I think.
ReplyDeleteOtherwise, GREAT JOB!!
Good amount of information for gardeners.
ReplyDeleteNice plan and update also.
nice tutorial
ReplyDeleteFantastic explanation, nicely clarified with diagrammatically.
ReplyDeleteWill be helpful for freshers who recently involved in Gardening.
Let me know one thing please ?
1. How to plant in Artificial containers which are not having holes? Whether we have to make holes or any other alternative solution?
Very informative. I have a balcony gardening, growing tomatoes and herbs and flowers. Glad I found this site :-)
ReplyDelete