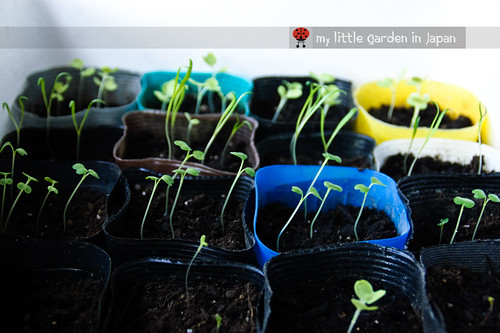
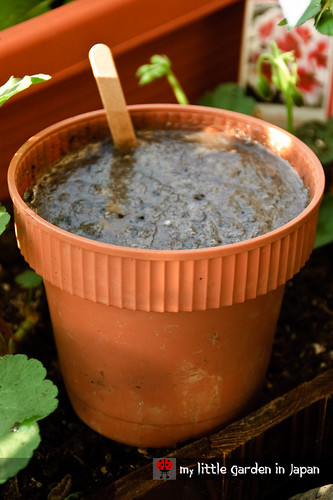
Showing posts with label Tips for good gardening. Show all posts

Thursday, 29 September 2011

A perfect container for growing strawberries in the balcony

As you know, I have lost my strawberry twice patch so far, once to some unknown disease and other time to beetles. So, to avoid having to buy everything from scratch again, I decided I must have some sort of back up strawberry patch. The only problem is that my little garden hardly can fit more plants and having duplicates for six varieties of berries takes a lot of space. Fortunately I found a perfect container to fit all of my berries in a very compact way.
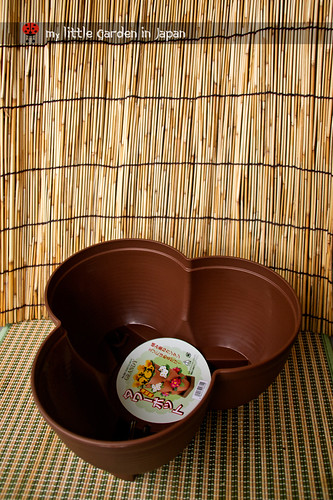
strawberry-stackable-pot-1

A great container for growing strawberries


While I was browsing around the 100yen store (dollar store) I found this amazing planter. It is a stackable three way pot. It is great, just the perfect size and depth. I can set my strawberries the same way as in a traditional strawberry jar pot, but because this one can be taken apart it is much easier to maintain. Also, I can shuffle around the levels to assure each plant gets lots of sun when they need it.
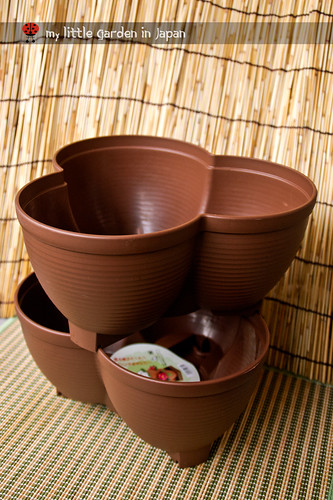
strawberry-stackable-pot-2

I can stack them and keep all my strawberries in a little corner


It is always good having a back up for valuable plants and this is just the planter I needed. Some of the strawberry varieties are hard to get or a bit expensive. I will save a lot of troubles and costs in case something bad happens (it already did, but more about that later).
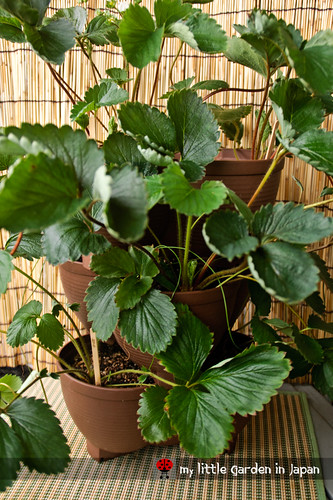
strawberry-stackable-pot-3

Now I only need to make some tags


The next step is to keep organized, I need to make some good labels and tag which strawberry is which one.

Friday, 27 May 2011

How to make lemon balm & mint tea

I apologize for the lack of posts lately. It has been a very busy and tiring couple of weeks. To start again with the blog, I want to share a little recipe that I found very useful to cope with all the stress.

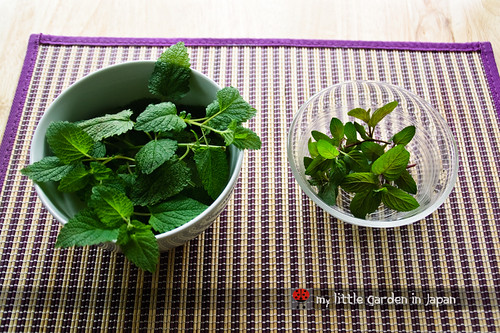
Just the other day, I had a lot of things to do but I needed to recharge, so I sat at the balcony for a little while. Then while I was contemplating my garden, it hit me, I should make some lemon balm tea. I have mid size lemon balm that keeps growing like crazy and I had never really taken advantage of it. Lemon balm is a great aid to fight stress and relax, it was just perfect. So, I got the scissors and snip some branches and made me some tea.

Lemon-balm-tea-1

Harvesting some herbs from the garden for tea


This is one of the reasons I like gardening so much, all the work you put in it always have a nice reward. Those of you who are thinking about starting a garden, take notice.

Here is my recipe, hope you enjoy it.
You can try making it with just lemon balm, but I enjoy the extra fresh flavor that mint adds to the recipe.

Lemon balm and mint tea


  • 10 fresh lemon balm sprigs
  • 5 fresh lemon mint sprigs
  • 4 cups of water
  • Honey

Making the tea

First get the water to a boil. Take your sprigs and break and fold them with your hands (no knife), this will help the oils get released. Then toss them in the boiling water for around 10 minutes. The longer you leave them the stronger the flavor will be, but, take care not to leave them to long because lemon balm is sensitive to over boiling, it gets a bitter flavor and loses the lemony scent. While they are boiling the water should will get a yellowish color and the scent will be very noticeable. I like leaving some of the leafs behind, but you can you can strain if you don’t want leafs on your drink. Add as much honey as you want and you are done. Enjoy your hot drink!

Lemon-balm-tea

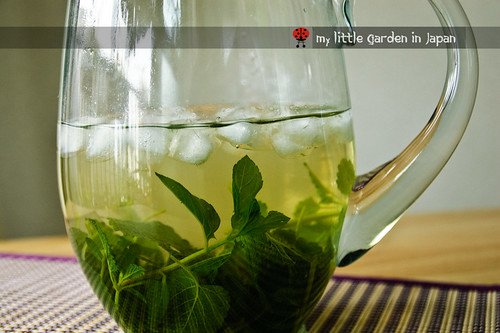
Delicious and relaxing lemon balm & mint tea


Now, I grew up in a place where 40 °C is considerate normal, so I tend to prefer cold drinks. If you are like me, just wait a little and add ice. The cold will take away a bit of the flavor, but you can crush the leaves more to get it back. And you are done, enjoy you cold and relaxing drink!

Other thing to remember, Lemon balm is also great to help digestion, and so is mint. So, in case you have upset stomach or you are feeling uneasy at the belly, give this tea a try.

Friday, 6 May 2011

Time to set up the trellis

This week I had a chance to set up the trellis for most of the new climbing crops. I also had to redo the grape one, because, when I moved I had taken it down. Now everything is ready for growing the season. I can't wait to see the tomatoes, beans and pumpkins climbing around.

time-to-set-the-trellis-4

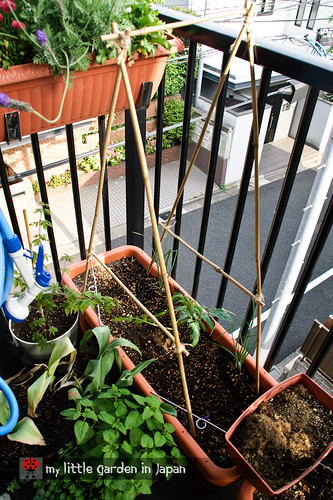
The "A" structure can hold a lot of weight


I did a different set up for every planter because they will all grow differently. One of the biggest is the big tomato, I think this will need the most support so I tried an A shaped trellis. For the mini tomatoes, a small square one for each will work well. And finally for the beans and pumpkin planter, I did a normal square wall. I hope they will be strong enough to carry everything.

time-to-set-the-trellis-2

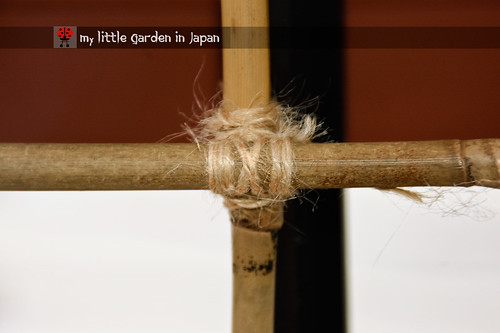
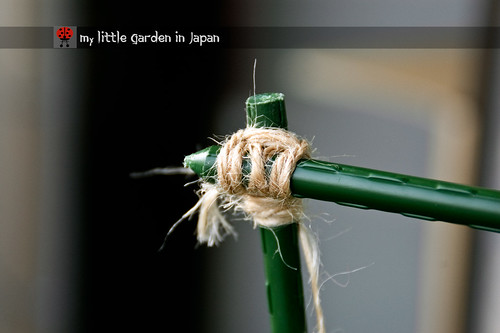
I have always liked this style of japanese trellis and knot


Of course I had to try doing the Japanese style. I used bamboo and japanese knots. I like how it works with trellis, the bamboo looks very nice, and when tied with that knot is very strong and secure. The only thing is that, because the bamboo I use is slim and not processed, it rots easily. So, I can only use it for temporarily structures like these seasonal supports.

time-to-set-the-trellis-5

I am hoping to see this little fence covered with plants by summer


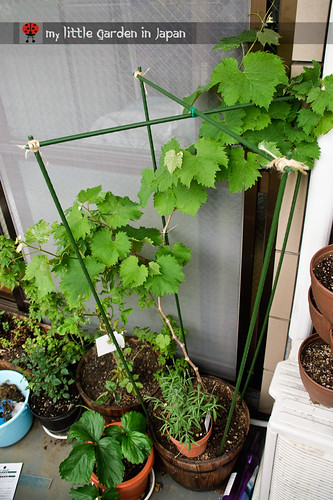
Now for the grape, because it has to be a permanent structure, I used metal/plastic rods. Since my grape is only on its first year and is still very young, not much strength is required yet to hold it.

time-to-set-the-trellis-3

Four pilars should hold everything nicely if they have a good knot


I set four pillars and two rods joining them in across to secure all. However, in the future, when the grapevine gains more weight I will add two more rods across at the middle level for extra strength.

time-to-set-the-trellis

With a little time, it will fill up all around


Thank you very much to those who asked about the grape structure! I hope this helps


Please help japan with a donation or good thoughts.


Help Japan

My best hope for those in Japan. You can help donate here.

Amazon
Google Checkout
Donation For Japan Earthquake 11th March 2011
American Red Cross
International Medical Corps
AmeriCares
Donate with Paypal
causes.com

Tuesday, 22 February 2011

How to grow a grape vine in a container

Spring is almost here, and to take the most advantage I have prepared a series of how to's for all things gardening, with special tips for all beginner gardeners and for those of you who only count with very little space for growing. To start, I want to post about how to grow a grape vine in a container. I had a lot of great feedback on the day of the world garden carnival with my post about my own grape vine, and also I got a lot of mails about people who wanted to know more about how to grow them like that.

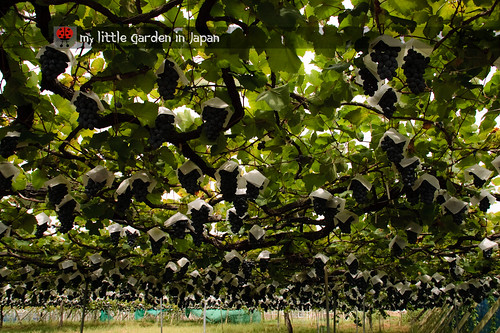
pione-grapes-from-japan

Is very easy to have your own grape vine


Growing a grape in a pot is very easy to do and also very rewarding. There is just a couple things to consider: You have to make some planning and later keep the plant in check or else it can grow wildly and get out of control. Here is how I do it. I hope you find it useful!

This small tutorial contains the basic care of a grapevine. Even if you are not growing in a container you will get a lot of benefits from following it

If you have further questions don't hesitate to leave a comment, send me a mail or a tweet.

How to grow a grapevine in a container


First a little check on the plant. Grape vines are very hardy are perennial plants, very nice and easy to grow in containers. They forgive a small dry spell and they can do well on poor soil. If they are trained properly they can take very little space. Grapevines are great for making a natural barrier or providing some extra roof in a pergola outside. And of course, the best of all is that they give very delicious fruit! There are hundreds of varieties of grapevines, and they can take a very wide range of climates. So chances are, if you want to grow them, there must be one perfectly suitable for you.

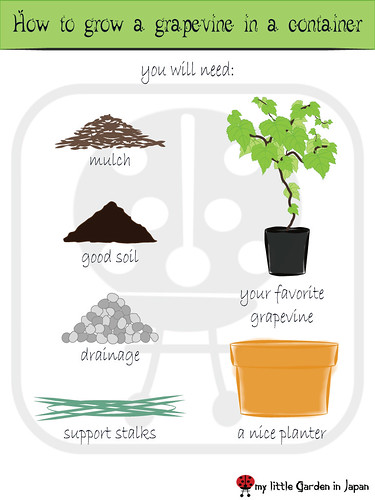
How-to-grow-a-grapevine-in-a-container-1

You will need


One thing to remember though is that new grapevines take a little time to give fruit. So if you want to have one in your garden make sure you are in for the long haul. Grapes give fruit on second year wood. This means that the new branches that grow one season will be the ones giving fruit next season. Also, is important to remember finding an appropriate site to grow your vine; Grape vines appreciate having full-sun. Having a lot of sun will help them bare more fruit.

Choosing your grape


Before anything you have to choose the type of grape you want to grow. Be sure to pick one that is adapted for your climate, that way the plant will have a much better chance of growing nicely. To make the picking of a variety easier, you can ask yourself a couple questions. What do you want to do with the vine?. Are you are after the fruit or just the leaves? What will you do with the fruit? Do you want to have a red or a green one? Once you have decided on those things you can ask in your local nursery or garden center for one that matches your description or just do a quick search online.

pione-grapes-from-japan-2

Pione grapes from japan


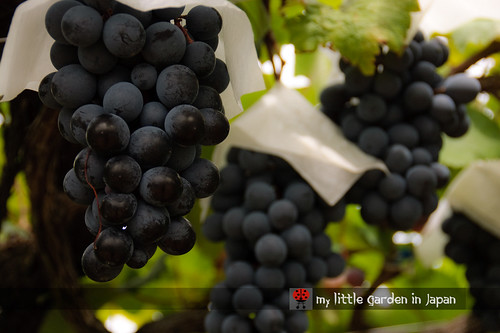
In my case I have a pione, it is a seedless purple table grape, it has an amazing flavor and the fruits get to grow really big. It is one of the favorites to enjoy here in japan.

The best time for buying new grape vines is around autumn, right after the harvests. That will give the plant a chance to grow its roots and get established in its new house before the dormant period.

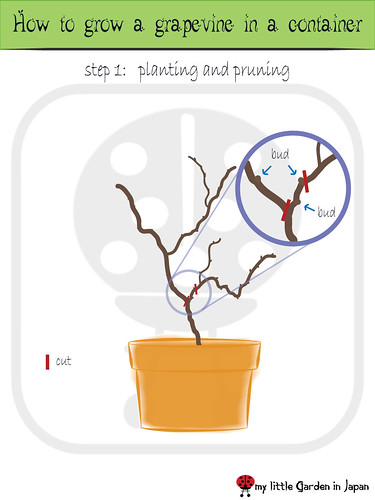
Step 1 Planting your grape and the initial pruning


Now that you have your grape is time to plant it on a pot. If you need some instructions to help you, be sure to check the post about how to plant in a container in here. The process is basically the same as with most common plants. Get a nice layer of drainage for your container and some rich black good soil. Grapes can take having poor soil, but they do much better if they are feed properly. Be sure to separate the roots when you are planting. Grapevines like having a chance to stretch their roots, this will help them develop and settle much more quickly. Remember to put a layer of mulch to keep the weeds away and keep the temperature of the pot balanced.

How-to-grow-a-grapevine-in-a-container-2

When your grape is set, it is time for a little pruning


Once you have planted your grape keep it growing freely until the season ends. This will allow it to grow strong roots and establish in its pot. If you got it early in the season it might get a bit messy with all the new growth, so you can do a small pruning during summer to keep it small.

When winter arrives your grape will drop its leafs and enter a dormant state. During this period it will need less resources, so be sure not to over water. By late winter, after the big frost but a bit before it starts growing again, it is time to the first big pruning.

The best way to prune is to make a diagonal cut away of the bud, just a little over the same. Also, you can cut right into the middle of the joints of the cane. This last technique can work very well, but you have to make sure to avoid damaging the bud, which is sometimes tricky.

The goal here is to trim your plant so only the two lower healthy buds remain. The bud is a small protrusion growing out of the trunk. It looks a bit like a mole or a small pimple growing from the bark. From these is where the new branches will grow.

Step 2 Building support


To help your vine grow neatly and under control you have to provide a structure for the vine to climb into. A sturdy trellis or wood frame will work well. You can form a small arch, a circle, make a stair shape, etc. There are many possible shapes you can try, let your imagination guide you.

How-to-grow-a-grapevine-in-a-container-3

Be sure to give it a strong structure for support


Depending on the size you grow, the trunk plus the leafs and the fruit can get a bit heavy, therefore the only requirement is that whatever structure you have must be strong enough to hold the weight of your vine. Also, make it with something that will last many years, since you will have it growing there long time.

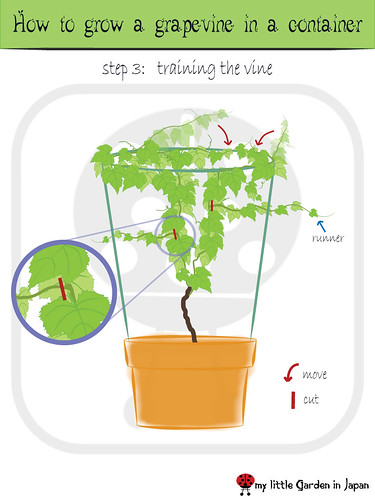
Step 3 Training your vine


The next spring after you did the heavy pruning, one main branch will develop from each of the buds available. The task here is to keep them growing on the shape you want. You can progressively tie your vine to the trellis as it grows, to maintain the form. Keep it on check regularly, especially during spring, because the vine can grow very fast.

How-to-grow-a-grapevine-in-a-container-4

Keep your vine neat and tidy


Because of the space restrictions on a container is best to keep only one or two branches growing (more if your container is big enough) thus is best to keep only the stronger branches. Prune away any runners that sprout from the core canes to give all the strength to the main vines. Once that your grape vine has reached the size you want, you can cut the tip of the vine to prevent it from growing further. The best fruit is given approximately from the sixth to the twelfth fruiting bud, so you can use this as a reference for the size of your grapevine.

After the season ends, and the vine enters its dormant state once more, you will have a skeleton that will be the main structure of your plant.

Right now, this is the step my grape is in. It can be a bit of effort to keep the vines in check, but I am sure the results will be worth it.

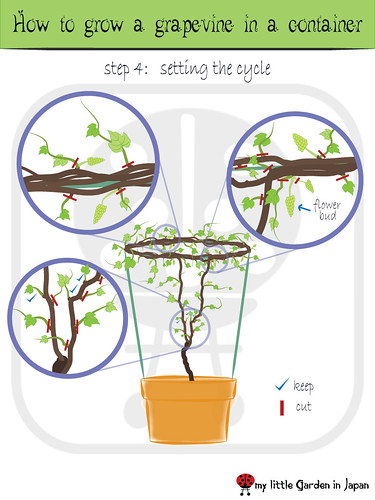
Step 4 Setting the cycle


This is the most crucial part of growing a grape vine. In order to keep the plant healthy and giving the most fruit over the years to come you must prune it periodically. Also, since fruit is bare in second year canes you must prepare one new fruiting branch every year. To help you do this is best to make a cycle of renewal, where every year a couple new branches will grow and substitute the old canes from last season.

How-to-grow-a-grapevine-in-a-container-5

Making a cycle of renewal will guarantee the best fruit


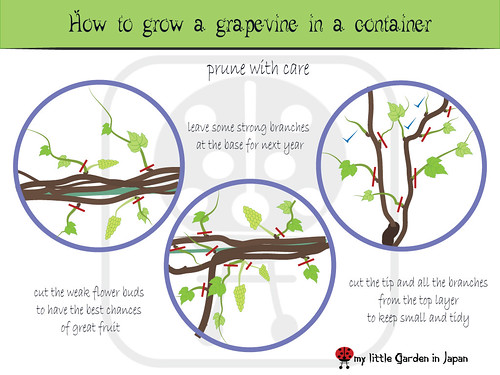
For this, every year, you have to prune away all the new runners and branches that grow from the top canes. Leave only a couple strong and healthy branches growing from the base and train them to grow into your structure as you did the year before. Also, every year, at the end of the season, prune away the old wood. All of those branches that gave fruit that year have to be taken away. The idea is that those new branches will substitute the last season growth as the new fruiting canes for next year.

Once this cycle has developed, you can continue it for many years. That way you will always have the best fruit from your grapevine and it will grow into a very nice and healthy plant.

Extra tips for growing your grapevine


How-to-grow-a-grapevine-in-a-container-6

Make sure to prune it carefully


  • During the fruiting season is a good idea to prune away any weak flower buds. This will help the plant concentrate its energy on the best flowers and give the best fruit. You should also take away any weak grapes growing in every bunch. There are a lot of possible grapes with every flower bud, if you take the smaller the rest will benefit and develop more and it won’t be noticeable.

  • Grapes are amazing plants, they grow very easily even without much care, but is always good to feed them a bit of fertilizer around the spring to help them develop new canes, and also during the height of their fruiting season to help them grow more delicious grapes.

  • Birds love having grapes as much as we do, so you might need to protect your grapes from them. Depending how much problems you have keeping the birds from eating all your fruit, you can use several methods. You can try small reflective material hanging or use a net to protect the vines.

  • The new vines in a grape plant are very flexible and easy to manage; you can try making shapes or patterns while you are training them in their planter.


Now remember, this is only one particular way of growing a grape in a container. There are a lot of other methods shapes, techniques and arrangements you can try. I have seen grapes growing and covering a whole balcony and have also seen a little small bonsai grape. You should try to see what fits best for your needs, and don’t be shy to experiment. After all, that is what gardening is about.

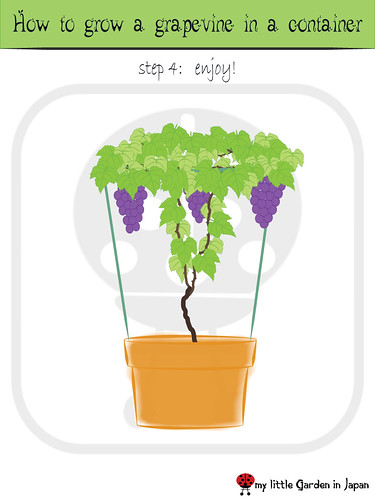
how-to-grow-a-grapevine-in-a-container

And that is how you grow a grape vine!


If you what to know more about growing grapes and other container gardening matters be sure leave a comment, send me a mail or a tweet.

Have a lot of fun growing your grape vine!


Wednesday, 2 February 2011

My tools for balcony gardening

This is a post I have been wanting to do since long time ago. I wanted to show the gardening tools I use to take care of my little garden in japan.

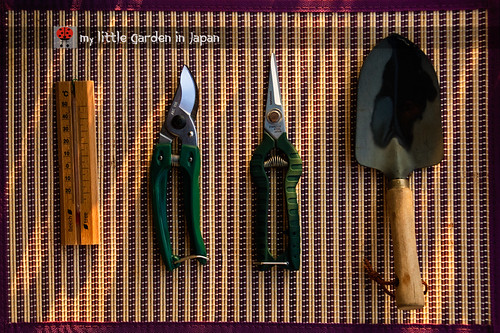
tools-for-balcony-gardening-5

My balcony gardening tools


First of all, a little disclaimer. If you want to have a small garden, you don’t really need to have any tools. They do help make the work easy sometimes, but you can always get away without them. For bigger gardens they might be necessary, but for a little balcony like mine, no tools are really needed. You can always use your hands or whatever is available to get the job done.

So, don’t be afraid of starting your own little garden, no tools or anything special equipment required!

Having said that, here is the very small collection of tools I have gathered over my time in Japan.

tools-for-balcony-gardening-4

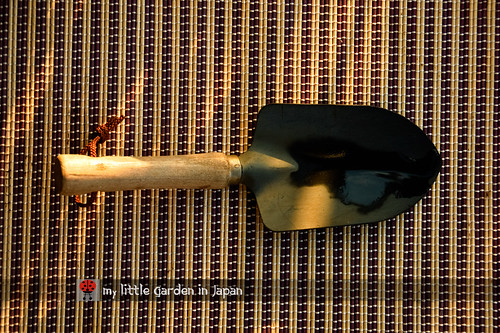
My little shovel


My shovel. A very basic component of the gardening gear. Good for moving soil around fast with out getting the hands dirty. I got this one very cheap at the dollar store. It is sturdy and has a wide spade, just what I need. I usually only use it when I need to move a lot of soil from one pot to another or when I need to mix soil. Otherwise I prefer using my hands. I like the very cool organic feeling of having a bunch of dirt on my hands. Also, using my hands gives me better control to handle the plants with the proper delicacy and finesse they sometimes need.

tools-for-balcony-gardening-2

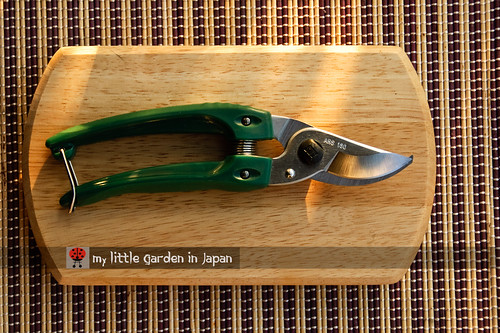
A set of gardening pruners can be handy


My pruner. This is the first big budget tool I got. I bought it because I wanted to shape around my grapevine with more control. I decided not to go with the cheap one for this because I consider it to be like a doctor scalpel, only for plants. I would not like my doctor to make an operation on me with a dull or bad scalpel, so I won't do it to the plants either. By the way, also remember: It is best to always clean your blades after using them. You wouldn’t want a surgeon to cut you with a rusty blade, so why do it to the plants? Also they will last much longer that way. They are way too expensive to be buying more every time just because we didn’t wipe it afterwards.

tools-for-balcony-gardening-1

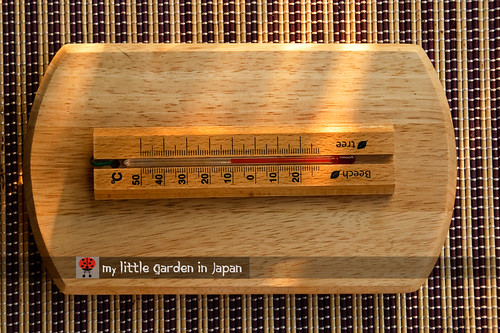
Is always good to know how is the weather


My thermometer. I only got this one because I wanted to see if the coldframe was really working or not, but it has become more handy ever since. It Is always good to see how the weather is doing. Being to know when is the time to sow some seeds or when to take some plants in. The on-line weather report might get it close, but will never tell you exactly how cold is out there in your little balcony.

tools-for-balcony-gardening-3

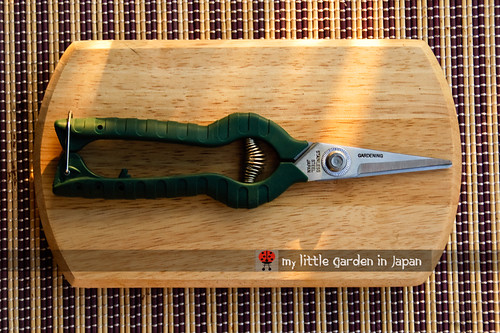
Gardening scissors are good for the small jobs


My gardening scissors. The most recent acquisition. I used to do most of the beheading of dead flower buds, the harvesting of vegetables and some other fine jobs with the big pruners, but they always felt a bit too big for that task. It was hard to maneuver them between delicate leafs or in the inside of the branches. The pruners were just too bulky. So, when I saw this good set of gardening scissors for sale at the garden center, they had to come with me that day. They do get very handy. And now, since harvesting and beheading is what I do most, they have become my most used tool. Of course I still behead and harvest with my hands sometimes, because is just more fun that way.

What tools do you use on your garden?

Also, It was a busy start of the week for me. I have so many exams, and after that a lot of projects to finish. But I will still try posting as often as I can.

Wednesday, 26 January 2011

How to set a plant in a container

Some time ago I had a couple friends ask me about how to start their own little garden. They had never really tried gardening beyond having a little indoor plant they bought out of a whim, so growing their own vegetables and mayor crops felt a bit too overwhelming. They wanted to know all the basics and I was very happy to answer all of their questions and get them started.

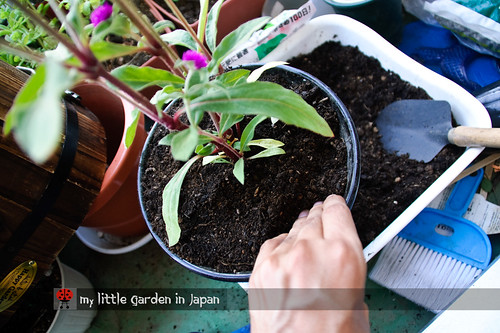
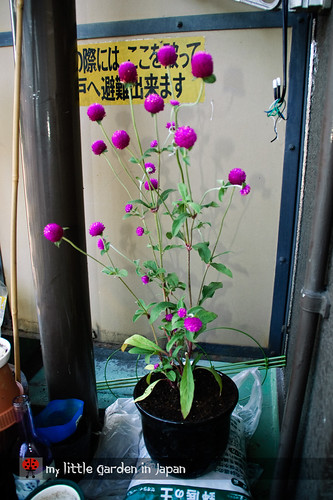
One of their first questions was how to set a plant to grow in a pot. I think this is a very good question, one that many people who is starting also have. So I decided to make a post about it. Here it is, a small introduction to container gardening for anybody wanting to start their own garden. I made it back when I plant my globe amaranth

How to plant in a container


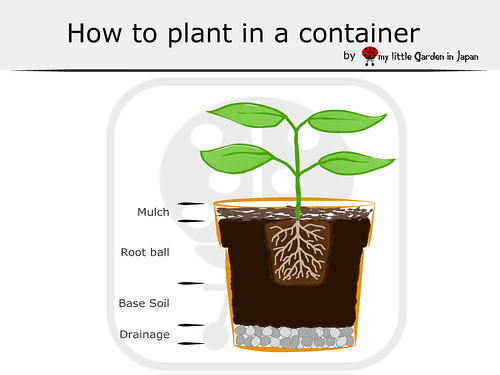
To start, let's check the fundamentals. The basic layers for a plant in container are as follows.

How-to-plant-in--a-container

The layers in a pot


  • At the bottom a drainage layer, this will help the water flow properly and avoid water clogs and damage to the roots because of this.

  • Then there is a base layer of soil. Here is where most of the new roots will grow.

  • On top of that, it goes the root ball of the plant, all surrounded by more of the new soil. The root ball is the main mesh of roots from the plant, usually all what was on the starter pot.

  • And finally, the top layer made of mulch. The mulch is just a protective cover over the soil. It is good to retain moisture, reduce erosion, provide nutrients and suppress weeds.


With this knowledge, we are ready to set our plants in their pots.

What you will need


How-to-plant-in-a-container-10

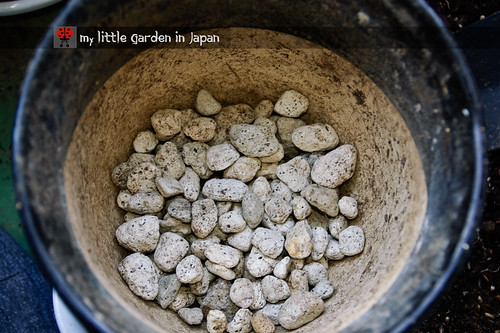
A good pot and gravel for drainage


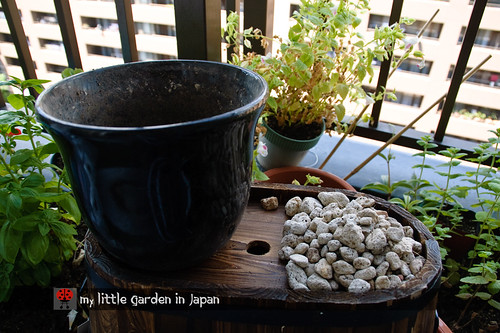
  • Gravel or other material for drainage You can use broken pottery, washed seashells, packing peanuts and many others.

  • A proper sized pot Not to big, not to small. Even if the plant will grow a lot, is best to repot several times in gradually bigger pots, than to put in a huge pot from the start.

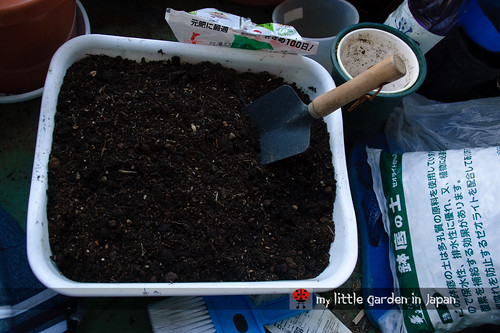
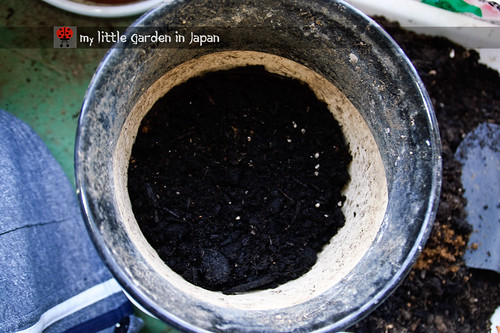
  • Good soil Depending on your plant different soils will be more recommended. However, black, rich in organic matter soil usually works well with most plants.

  • Much Peanut shells, dried leafs, shredded or chipped bark, straw, etc.

How-to-plant-in-a-container-9

Black, good soil is best


Setting your plant in the container


  1. First, If your plant just came home from a greenhouse or a garden center far away with a different climate, let it rest for a couple of days. This will help it adjust to its new environment.


  2. Water one day before or in that morning to assure the plants have plenty of water and also because working with moist soil is much easier. Remember, the soil must be moist, not damp.

How-to-plant-in-a-container-8

This hole was too big, so I got some wood sticks in to help


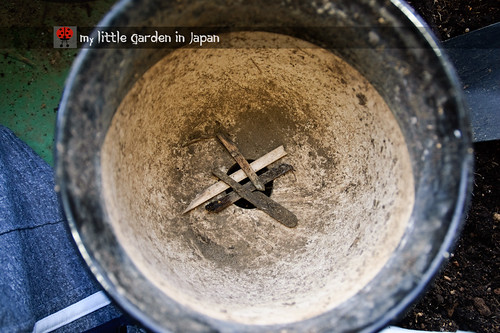
  1. Rinse or scrub the container to get rid unwanted materials, then check to make sure it will have proper drainage. If the hole is to small, make a new one, if it is too big, put something to partially obstruct it.

How-to-plant-in-a-container-7

Good draniage is essential


  1. Add a layer of drainage material. Between two to six centimeters should be enough, but adjust it depending on the size of your pot, and remember to make it even.

How-to-plant-in-a-container-6

Add enough soil to have a good base


  1. Add the soil, compost, or potting mix, to have the soil base. Put enough soil to assure the plant will be at the proper height. Some plants, like strawberries, have a depth they like to be. For those make sure the amount of base soil will not make the newly potted plant be deeper than it was in the original pot. Others, like tomato, prefer to be buried deeper than they were, so they can grow new roots from the stem.


  2. If you are going to add some fertilizer you can add it in this layer. But make sure it is slow release fertilizer, to prevent it from burning the growing roots of the plant.

How-to-plant-in-a-container-5

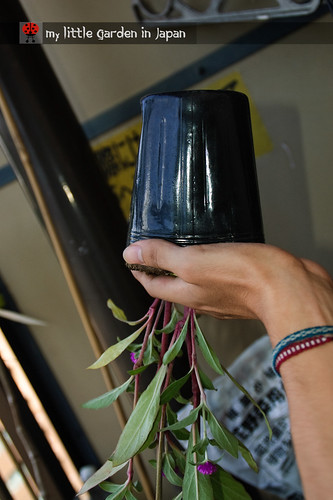
Hold the plant firmly, then carefully turn upside down


  1. Now the tricky part, get the plant out of its old pot and into the new one. To remove the plant from its old pot, slip your hand over the top of the pot, holding the plant's stem between your fingers and the soil with your hand, then turn the pot upside down. Give the old pot a little pat and gently sake it and pull it up until the root ball is out .
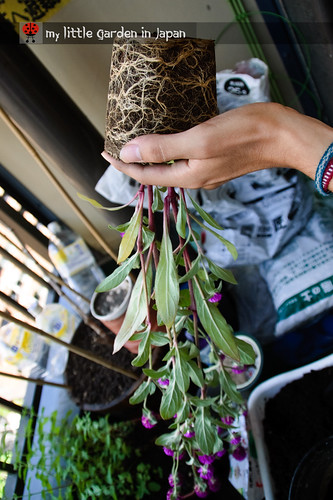
How-to-plant-in-a-container-4

Untangle the roots


  1. At this point, you will be holding the root ball. If the roots encircle the plant, very gently try to loosen up some to untangle them a little. This will help the roots to spread out in their new pot and prevent many problems later on. If the roots are too tangled together you can snip a couple or slice about a centimeter of the outer layer of the ball.

How-to-plant-in-a-container-3

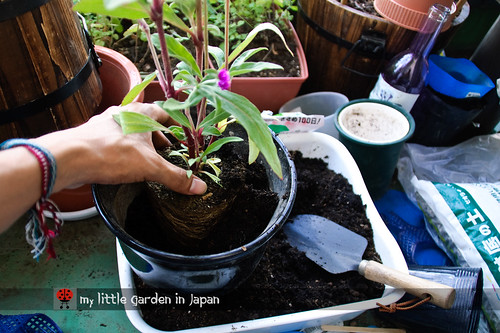
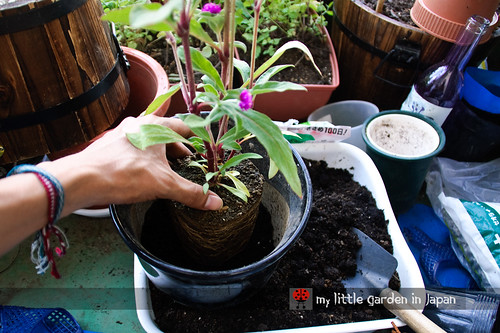
Place the plant in the pot


  1. Carefully place the plant on its new home, make sure is centered and leveled, then spread out the roots a bit more.

How-to-plant-in-a-container-2

Add soil around the roots and press to get rid of excess air


  1. Then add the rest of the soil evening it out and pressing the soil against the plant, just enough to eliminate any large air pockets without compressing the soil.

How-to-plant-in-a-container-1

Good soil will make its own mulch


  1. Add a final layer of much if you want to, the plant with sure appreciate it, although is not completely necessarily.


  2. Finally, water thoroughly, until water runs out the drain holes, to moisten the roots and to settle the soil.


And there you have it, the plant is set.

How-to-plant-in-a-container

Take good care and it will live happily


Keep it in place with plenty of light but away from direct sunlight for a couple of days If you can. Also take extra care of it for some time to make sure your plant adjusts to its new house. And remember, plants should be moved into larger containers as they grow. So you might need to repot them later, maybe every couple of years or less depending on the plant.


Friday, 21 January 2011

A little about Wasabi and Shiso

First of all, I want to thank everybody for participating in the world garden carnival! We had almost 50 entries with a lot of amazing ideas and projects for the starting year. It is always great to see so many gardens around the world and get to meet so many people.

It always amazes me how we can connect even when we are so far apart. I feel like you are all my neighbors from around the block. We ask each other for advice, give support, and share our passion for gardening. Thank you very much!

It also amazes me how much inspiration can surge, from this interactions that we might not otherwise have. I have come up with so many ideas and I discovered some activities that I really enjoy thanks to this. For example, lately, I have been getting some mails and having some conversations, where I have been asked about "how to grow", "how to take care" or just special questions about plants or gardening.

Now, I must say, I am not an expert. I might have some knowledge and practice on growing plants and gardening in general, but I still have a lot to learn. But that is precisely the part that I have found most fun. When asked about things I don’t know, I try to go and look them up. It might be my researcher nature, (that is what made me go into engineering and academics) because I really like investigating, researching and coming with a proper answer.

One example is, some time ago, I had a couple of mails from Cina from My Obsession My Compulsion. (She gives a lot of very detailed information on a great variety of plants on her blog. Check it out if you can) where she ask me if I knew something about some Japanese herbs. Although I didn’t knew much of the herbs in question at that moment, I was more than happy to help her.

I look around and in the end I did got some good information that I hope was useful for her. I enjoyed a lot researching for this data, and I learn a lot while doing it too. Here is a tiny bit of what I found on some of the plants she ask me about.

About wasabi


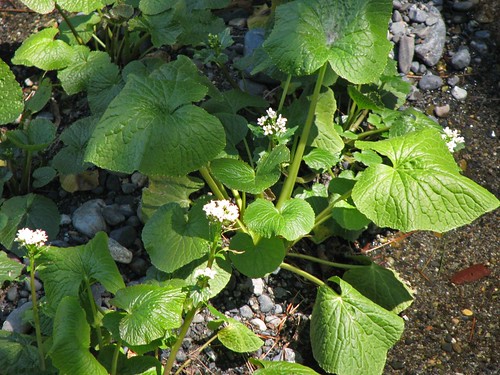
IMG_5017 Wasabi plant

Wasabi plant


  • A staple of Japanese cuisine.

  • It is also known as "Japanese horseradish".

  • Its root is used as a condiment and has an extremely strong flavor similar to mustard.

  • Wasabi is a Brassica, so it is related to Cabbages, Cauliflower, Broccoli.

  • It is a very hard pant to grow because it has very specific requirements.

  • If grown correctly it will grow slowly for two years before is ready to harvest.

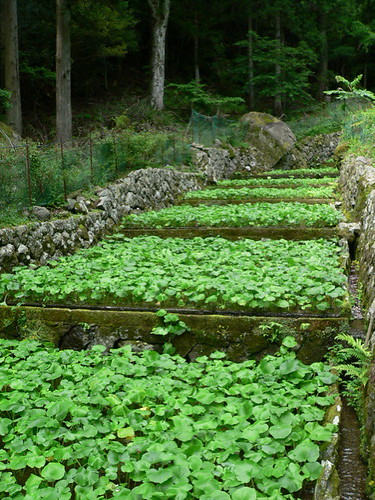
Wa-sa-bi

Wasabi growing in the mountains of japan


  • It prefers cool, shady conditions. In japan it is usually grown in the mountains, using the running water from misty mountain streams.

  • At home might be best kept in a Aquaponics system, to keep them wet all the time, even the seeds won’t survive long time without the proper moisture.

  • The hardest part of growing wasabi might be getting a viable plant, seeds or plants are not easy to find.


A little about Shiso


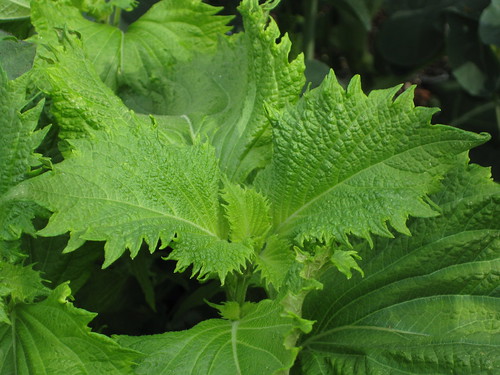
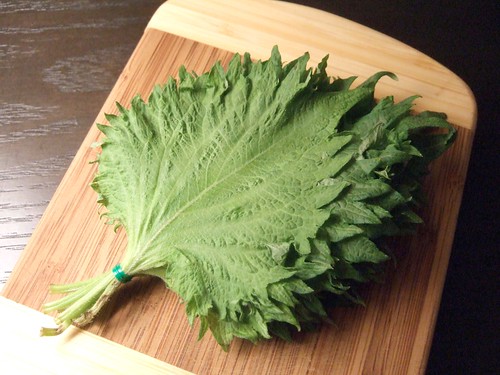
Shiso

Shiso plant


  • Also known as perilla ot beefsteak plant.

  • Great herb for cooking, garnishing and with some medicinal proprieties too.

  • It grows up to 130 cm tall. It has big and toothy leaves, with ruffled edges, and fine hairs on them.

  • It comes from the same family as basil, so the flavor is somehow similar but the texture is very different.

  • It is a very nice plant to have. It is an annual, but it reseeds easily with the proper conditions. Goes great with sashimi.

Shiso Leaves

Shiso is a great for cooking and garnish


I will post more about this and other Japanese herbs later. In the meantime, if you have any question that I might help, feel free to send me a mail. I will try to give my best knowledge. Or, if I don't know, I will look around for the best answer possible. It might take a bit for me to get back to you if I get "school busy", but I will try to answer as fast as I can.

Also, while we are on the subject of online gardening neighbors. I want to give a special thanks to Jo from The Good Life for giving me a blogger award. I enjoy your blog very much too. Thank you!

Wednesday, 15 December 2010

Coldframe V2.0

I had been wanting to upgrade my coldbag, because even it works really nice, the little seedlings could have even more advantages. In particular I wanted something that would let more sun to the little seedlings. 

coldframe-v2-3

The new seedlings are doing great


So I started scavenging for materials to use. I didn't wanted to build one out of wood and glass, because my goal was keeping the portability and cheapness of the cold bag. I considered using a cardboard box, but I knew that on the first rain, or with the water pouring out from the little started planter, I would end up with a cold frame soup in no time.

Then I remembered that here, at some grocery stores, they always leave all the plastic boxes from the food, all cleaned and ready for people who need them to pick them up. So, one day I went grocery shopping, I took a small look at their little recycle corner. There I found the perfect box. It was a deep, thick expanded polystyrene box, in perfect condition.

coldframe-v2.0

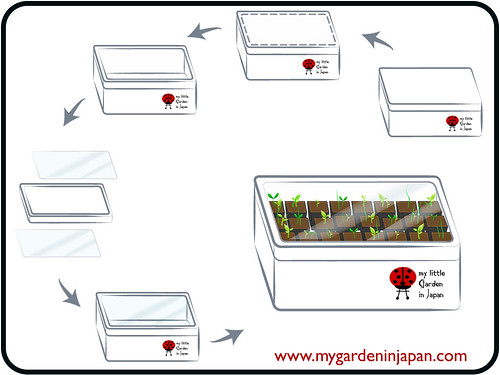
Building the new coldframe


The build was very simple.
  1. I carved a small window on the cover of the box to leave only a frame. Being sure to leave a small edge

  2. Cut apart a transparent plastic bag to have two sheets to use as "glass".

  3. I taped one of the transparent sheets to the edge I had left and cover the hole in the frame.

  4. Turn around the lid and tape the other sheet from the inside. This will make the window a sandwich of plastic, air and plastic.

  5. Finally use little pieces of tape to cover any hole in the borders. The more airtight the better

I used two plastic sheets, one in each side of the cover. That way the insulation will be much better. The air in the middle will work as the insulator. The same way a double glass (double frame) windows work better than a single glass window. 

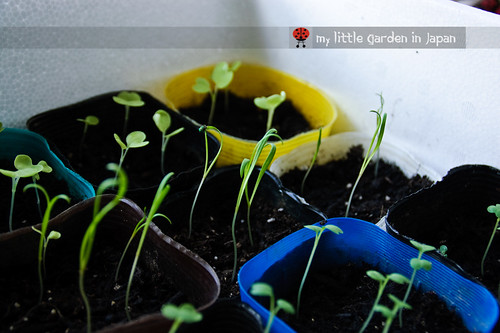
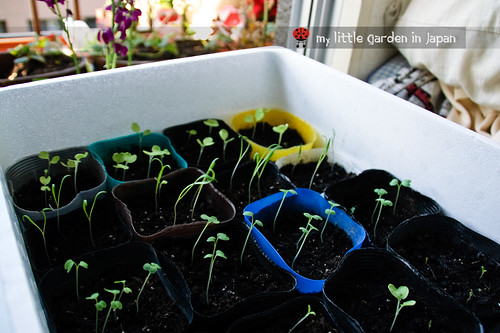
So far it has worked beautifully. The little seedlings growing there sprouted in no time, they have even reached the size of the ones in the coldbag already.

coldframe-v2-2

From back to front: Bekkana, Spinach, Komatsuna, Lettuce


The first to grow were the Bekana and the Komatsuna, then the spinach and finally the lettuce, coriander and the chives. I was surprised the chives and the lettuce sprouted, they are supposed the be past their season. They must really be very cozy and warm in there. I hope they all keep growing nicely, I will post more about how they develop later.

Now, the only setback is that the new coldframe has such a good insulation that every morning the inside screen appears all damped because of the condensation. I have to dry it a bit and clean it up so it will let the sunshine in.

I recommend anybody who wants to have a nice cheap planter at their homes to use old expanded polystyrene boxes. First, because is much better to reuse them than throw them to the garbage. Second because they are great planters. Expanded polystyrene is a great ecofriendly material, even though it certainly doesn’t look like it. It is a great insulator, and has an amazing endurance for such a light weight. It definitely won't mold and It will not degrade easily, so I can last lots of gardening seasons.

coldframe-v2

The first seedlings sprouted in 4 days


One more thing about polystyrene. It is highly recyclable, but it very hard to do it because it has to be sorted away from other materials, which is a very troublesome task. This causes a big problem because it is usually thrown with normal garbage and pollute instead of being recycled. So, if you can rescue some polystyrene from going to the dumpster, and give it some more years of use please do.

Friday, 19 November 2010

Using banana peels as fertilizer for container plants

To ensure all the flowers in my garden will continue to bloom nicely I decided to add a little of fertilizer. But, because I did not wanted to spend much money on specialized fertilizer and also because I prefer to use more natural methods, I choose to go cheap and simple with some good home made plant food. Lucky for me I always enjoy having banana milkshake so I have a lot of banana peels available, great for what I need.

banana-peels-fertilizer-1

One banana shake fertilizer order coming up!


Many gardeners know the great benefits of using banana peels in the garden as a fertilizer. They are great for helping roses (I used it successfully with my little yellow rose before) and many other plants get more flowers. Bananas are rich in phosphorus and potassium, both of them important macro-nutrients for the plants. Potassium in particular is the responsible for the new formation of flower buds.

The most common method of using them is just cutting them in chunks and burying them around the fresh soil for the plants. However, for us container gardeners, it gets a bit more tricky. We cannot just stuck some peels in our containers because, in such a little space, there is the risk that the decomposition process of the peel would damage the roots of the plants.

banana-peels-fertilizer-2

Mix the blended peels and eggshell with soil and let it rest


So here is my little trick, since I am already having a banana milkshake, I also make a shake for the plants. All you need to do is toss the leftover peels into the blender, add a little of water ( I sometimes use the left over water from washing rice, it helps even more), and if you want to give it an extra punch, throw in a couple of leftover eggshells. Blend until smooth. When it is done you will end with a not so good looking shake, but the plants will love it. To help the plants assimilate it even better, you can mix it with some soil and let it rest a week.

banana-peels-fertilizer-3

After a week you get some nice potasium rich soil


I would recommend to be careful with the recipe. Remember, it is fertilizer. Judge well how much to feed to each plant. I did this wrong by mistake last time and I ended up having too many flowers on my peppers, so many that they only gave one single pepper for the whole season.

On I different topic, I have been having such a good response on the blog lately that I want to give something back. I am planning on organizing a blog carnival for the end of the month. Blog carnivals are great, they help beginner or unknown bloggers get discovered, and also help more established blogs get new ideas and inspiration.

I haven't decided on the topic though. It is between, posts showcasing the favorite plant of your garden in that month, or a roundabout of how everything is going on in your garden, sort of like my little monthly update.

Which one would you like to participate in? Any other topic you prefer?

Please let me know what do you think in the comments.

Have a great weekend!

Friday, 10 September 2010

My quest for a ladybug

This summer I had small problem dealing with aphids, they appeared one day and took over my garden. Most were on the strawberries, but later they moved to the calla lily, the roses and the peppers. I managed to get rid of them, but not without some struggle. In the end my best ally were ladybugs.

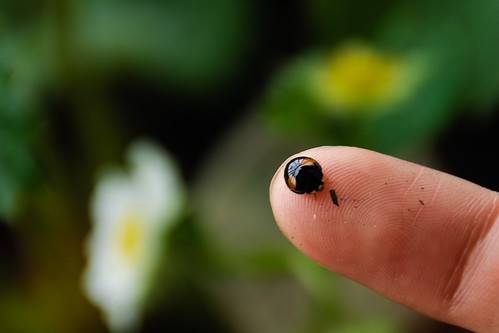
Tinny ladybug

Ladybugs are great for the garden


When the aphids just appeared I tried to kill them manually, not the best idea, it took too long I could not kill all of them. The problem started to get serious, so I decided I needed some help. Because the strawberries were about to bloom I didn't want to use chemicals or any unnatural to take care of them. I remembered that ladybugs are great aphid eaters (you don’t imagine that such a cute bug could be so voracious, but they certainly are), and figure out they could easily take care of the pest. The only question back then was, where could I find some ladybugs?

Luckily those early days of summer every time I stay up late with the lights on and the window open, at least one (but usually more) little ladybug sneak into the room and try to get cozy next to the light bulbs. The only problem was that early in the morning at the first chance they flew out the window to never been seen again.

So, how could I keep the ladybugs from running away? I did some research on line and I found out a lot of information about how to attract ladybugs and how to release them effectively on the garden. Based on that I figured out I could catch some of those that went in overnight and let them free the next morning with some incentives to stay.

The next night I caught a couple and got them in the fridge to lower their temperature and make them sleepy (don’t worry it doesn't harm them), then the next morning I release them on the strawberries. I had to repeat the process for several days, because they didn't stay long enough to eat all and the aphids keep reproducing.

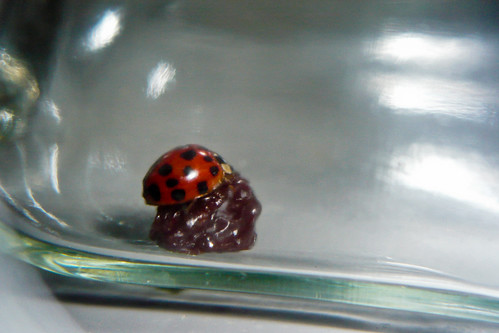
My ladyfriend

Ladybugs like raisins


I was starting to get frustrated because they didn't finish them all until one day I discovered one of them had laid some eggs. That was perfect, It would be even better than adults, ladybug larvae eats aphids as good as an adult ladybug and they can't fly, so they stay until the job is done. Later that week those eggs hatched and there were some little baby ladybugs roaming around my plants.
My garden June 15, 2010-2

A little ladybug larvae searching for more food


I let them go around freely, I only move them from one site to another whenever they finish all the food in one plant. They ate like crazy and finished all aphids in two days, It was really amazing to see them at work.

One of the best advices I can give to any gardeners is to make friends with the ladybugs. They are one of the best beneficial insects for the garden, they help a lot with pests, a little with pollination, and they are very pretty to look at. I would recommend everybody to make their garden appealing for them.

I think in the future I would make a little ladybug house for my garden, it would help them to have a place to stay over winter, they are pretty easy to make and is always good to count on some lady friends to help with the garden.

Related Posts Plugin for WordPress, Blogger...